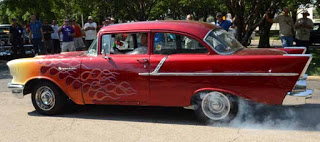
Headlights Switch Replacement for a Tri Five Chevy
-Alan Arnell
Description: How to remove and replace the headlight dashboard pull switch in a 1955, 1956, 1957 Classic Chevy Tri Five.
I have had to take my headlight switch out of my vintage 1957 Chevy model 150 2-door sedan two times. The first time was to replace the switch because the dome light would not turn on. The 150 does not have switches in the door that turn the dome light on when the doors are open. If you want to see in the dark the operator of the car must turn the dashboard light dimmer switch part of the headlight switch to illuminate the dome light. After replacing the switch, I installed a new wiring harness in the 57 and had to take the headlight switch out again. Not a real hard repair other than removing the switch holding nut to remove the switch from the dash.
Removal:
- Disconnect the negative side of the battery.
Pull the headlight switch knob out to the on position.
- Reach under the instrument panel and depress the switch shaft retainer button that is on top of the internal switch and pull out the knob and shaft assembly.
Remove the retaining ferrule. Also remove the escutcheon and bezel, then remove the switch assembly. A ferrule is the switch’s retaining nut. The nut screws into a threaded metal flange made into the switch behind the dash. The ferrule is a threaded tube with a slotted head. The slot is wider and thicker than any screwdriver I own. I had to make a special tool of the correct width and girth. The ferrule is made from pot metal and can be damaged very easily. If a too wide the tool being used may scratch the plastic escutcheon. If the tool is not thick enough the slots in the ferrule will wallow out making it hard to properly tighten the ferrule.
- Disconnect the multi-plug connector from the lighting switch. You may have to use a screwdriver to pry the plug from the switch.


Installation:
Apply a thin coating of electric anti sticking grease on the brass male connectors.
- Connect the multi-plug connector to a new light switch.
- Place the switch in position behind the dash. Install the bezel, escutcheon and the ferrule.
- Push the switch knob and shaft assembly into position until it snaps into place. My new switch replacement switch shaft was too long. I had to shim the back of the switch moving it towards the firewall to make the switch knob look correct in the off position.
- Reconnect the battery.
- Check for proper operation of the headlights and dome light.

 |
| Homemade ferrule removal tool. |
++++
#Classicchevy #TriFive #ClassicCar #Chevy #Chevrolet #Belair #Carshow #Custom #Musclecar #HotRod #StreetRod #DragRacing #55Chevy #56Chevy #57Chevy
!!!Support Texas Classic Experience!!!
Did you like the blog? If you did, the best way to support Texas Classic Experience is to share this post! Please tell others that you liked this post by sharing it with your car friends by sending them a link to this page. http://texasclassicchevyexperience.blogspot.com/
Texas Classic Chevy Experience will post blogs about: Hot Rods, Chevy, Chevrolet, Drag Racing, Car Shows, Classic Cars, Custom Cars, Muscle Cars, How to Tech. posts, Dallas Area Classic Chevy Club, Texas Muscle Car Challenge, Tri-Five Nationals, Lone Star Chevy Convention, Classic Car lists, Classic car links, Spotters guides, Car Shows, Swap meets, Book reviews and More.

No comments:
Post a Comment
Note: Only a member of this blog may post a comment.