Installing a Sway Bar
Tri-Five Chevy
-Alan Arnell
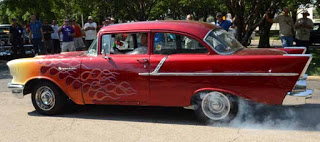
One of the best handling additions I ever made to my candy-apple red 1957 Chevy, Model 150, 2-Door sedan was installing a Sway Bar. The anti-sway bar is used to tie the frame to the suspension to limit how much the car will lean when in a turn. Original tri five sway bars were ¾” in diameter. The one I chose was a middle of the road ⅞” bar but you could go up to a 1 ¼” bar. A sway bar is a easy install to make on your Classic Chevy. The whole project can be completed with simple garage hand tools.
When I first purchased my ‘57, I concentrated on driving her and fixing the mechanical deficiencies. The roll in a turn was more than I could handle with the old girl, so I decided to replace the front suspension bushings, front and rear shocks and add a sway bar. I put the other parts on and about 6 months later I got around to installing the sway bar.
My friend Danny always says, “You never lose anything,
you will find it again when you don’t need it anymore.”
I prepare my car to put on the sway bar, when I quickly notice, that I can not find the end links bolts, nuts and elbows. I spend the rest of the day looking for them and quit after I have wasted my work window to no avail. The next day, I gave up looking for the parts to decide to buy new end links and make my own elbows. I finished jacking the ‘57 up and went to Auto Zone and Home Depot to get replacements of my missing parts.
Instead of holding the car up with jack stands so I can get under her to complete the project I place two 20-pound weight lifting weights under each front wheel. Raising the car this way keeps the suspension parts in their normal ride configuration.

To hold the sway bar in place to decide on its correct placement, I used jack stands under the bar and bailing wire to complete a mock up of the sway bar’s finished position.
It should take the common man generally four hours to complete the sway bar upgrade. Making new parts for lost parts and not trusting my measurements, plus travel times, I spend nine hours from jack up to jack down.
Tools Needed
Electric Drill with a ⅜, 7/16 and ½ ” Drill Bits, SAE- Socket Set, SAE-Wrench Set
How-To
The Sway bar will be attached to the bottom of the frame in front of the lower control arms. The bar is attached to the spot where the sections of the frame and C-channel connect. Using a piece of tape for a marker, mark the bottom of the frame.
- At this point, I lined up the bar’s center to the frame’s center. I used jack stands to mock up the placement of the bar. To hold the end up, I wired them temporarily in place with bailing wire. If your car’s frame is perfect and wheels and tires are stock configuration you will not need to be a paranoid as I was that day. I know my frame is off, I have large tires and off seed Rally wheels.
 With the bar mocked up, I turn the front wheels right and left from lock to lock to check to see if my over-sized tires rub the bar. That is why I used the old round 20-pound weights, so I could turn the front wheels back and forth without lowering the car and then to have to jack it back up. I had to custom place the bar a little off center to stop massive rubbing. Even with the custom placement, I can not stop the front tires from rubbing on the bar. I made happy medium and went on with my project. Later, I put narrower tires on the front that solved the slight rubbing problem during full lock turns. Also when I put disc brakes on the front the upgrade will move the wheels out a ½“ or more.
 - The end links are attached to the lower control arms using an elbow bracket. With original trifive a frames the elbow bracket may be bolted on, whereas if the car has been upgraded totubular lower control arms they will have to be welded on to the tubular control arm. Since I lost my supplied nuts and bolts and I did not have sharp drill bits of the correct sizes, I welded on the elbows to my original style control arms.

- The bar center to the frame. Mark both the frame and the bar with tape in exact center and lign up the bar to the frame. It is important that the front tires are on the the ground with the suspension at its ride height when marking location on the lower control arms.
- A way to check to see if you have the bar forward and rearward in relation to the car is to make the bar clear the front mount for the radiator core support by ¾” .
- With the frame all measured and marked correctly, drill two holes to install the square U-bolts on both sides.

- Bolt the bar into place.
- Hook up the end links


You are done. Recheck all your nuts and bolts for tightness with the weight of the car on the wheels, just to be sure.
I had already put on shocks and bushings on my car, but the sway bar made the biggest difference by far for a better handling car.
I later found the elbows and end links about a year later. They were in a drawer where I never store auto parts until then. Go figure!
++++
#Classicchevy #TriFive #ClassicCar #Chevy #Chevrolet #Belair #Carshow #Custom #Musclecar #HotRod #StreetRod #DragRacing #55Chevy #56Chevy #57Chevy
!!!Support Texas Classic Experience!!!
Did you like the blog? If you did, the best way to support Texas Classic Experience is to share this post! Please tell others that you liked this post by sharing it with your car friends by sending them a link to this page. http://texasclassicchevyexperience.blogspot.com/
Texas Classic Chevy Experience will post blogs about: Hot Rods, Chevy, Chevrolet, Drag Racing, Car Shows, Classic Cars, Custom Cars, Muscle Cars, How to Tech. posts, Dallas Area Classic Chevy Club, Texas Muscle Car Challenge, Tri-Five Nationals, Lone Star Chevy Convention, Classic Car lists, Classic car links, Spotters guides, Car Shows, Swap meets, Book reviews and More.
No comments:
Post a Comment
Note: Only a member of this blog may post a comment.