Showing posts with label Disc Brakes. Show all posts

Saturday, June 11, 2016

Classic Car One Person Brake Bleeding


A fine example of a 1957-150 Classic Chevy 2-door sedan, not a Belair Hardtop.

Classic Car One Person Brake Bleeding

  -Alan Arnell


The classic car is a different breed than your late model car.  For, the classic has no ABS or other computer added devices to aid the daily commute. When I took driver’s training in a 1973 Caprice Classic, I vividly remember my driving instructor, Coach Lauber saying , “Pump the brakes, pump the breaks!”


Brake bleeding is necessity when doing a brake job on you Classic Chevy.  Unless, you like having a spongy brake pedal bleed the brakes.  But the problem you may have is that you have no helper, which is sadly needed when bleeding your car’s brakes.   But never fear, there is hope after all once you have learned the little tricks of the trade I will present in the text.


Rear Brake Caliper.


After installing new pads or disks on you classic car, in the efforts of safety, one must bleed the brakes to remove the unwanted air in the lines that prevent effective brake action. However, it may help to bleed the brake lines even between brake jobs.  Bleeding your brakes removes old fluid that has absorbed moisture or has had been exposure to excessive heat, and eliminates air from the system. Since air is compressible, it does not transmit pressure well.  Also, brake fluid must not, to be completely successful, impact rubber parts, freeze, corrode internal components or deliver a low boiling point, therefore the condition of the fluid is critical.  


How to Steps:


Fill the master cylinder with approved brake fluid.  Keep the reservoir at least half-full during the bleeding. Make sure to reinstall the master cylinder lid.  I learned the hard way that fluid may squirt out of an open master cylinder.  My 1978 Corvette fender was splashed with brake fluid with disastrous results.  Brake fluid will ruin shiny paint before you can wipe it off.  If you think that the master cylinder has air or moisture in the fluid the cylinder must be belled first.


zzzzzzzzzZZZzzzzzzzzzzzzxxxxxxxxx.jpg
Safety First!

  • Jack up and support your car with jackstands.  Block a wheel on both sides by choosing a wheel that is not being worked on, that is in contact with the floor.  Be sure to shake the car to check that the stands are set correctly, before putting human body parts under the car. Remove the wheels for easier access to brake bleeders.  Do not remove the brake drums. Release the parking brake. The sequence of brake bleeding is to start with the wheel farthest from the master cylinder to then proceed to the next farthest and so on.  Or, the right-rear wheel first, then the left rear, right front and the left front.
  • Take your dry water bottle and add enough new fresh brake fluid to create an inch or so of fluid at the bottom of the bottle, so the vacuum hose will be submerged in the fluid.
  • Take the other end of the vacuum hose and install the hose to the bleeder valve nipple.  Ensure, the hose has a tight fit.  
  • Slightly loosen the bleeder valve usually about ⅛ to ¼ turn.  Leave the bleeder wrench on the valve.

  • zzzzzzzzzZZZzzzzzzz.jpg
  • Position the bottle just below the wheel so it can be viewed while pumping the brake pedal by hand.  


  • With the bottle in view, slowly pump the pedal until air bubbles are no longer present. Normally, three to four strokes will be needed to purge air bubbles from the hose.  With the absence of air bubbles coming from the hose during pumping, pump three to five additional strokes to ensure the lines are purge the old fluid out of the caliper or wheel cylinder.  When finished removing old fluid and air, retighten the bleeder valve.  

  • zzzzzzzzzZZZzzzzzzzzzzzz.jpg

  • Top off the master cylinder with new brake fluid.  Note:  If you have to pump several strokes on one wheel you may need to add fluid to the master cylinder before moving on to the next wheel.  Always maintain fluid in the master cylinder.  If the master cylinder runs dry, air will enter the brake system and the process will need to be repeated.

  • zzzzzzzzzZZZ.jpg

  • Bleed all four wheels.  Remember to check the master cylinder fluid level after each wheel is bled.  Ensure all bleeder valves are shut immediately after bleeding.  Note:  Flushing the entire system usually requires about one quart of brake fluid.


!!!Support Texas Classic Experience!!!
Did you like the blog?  If you did, the best way to support Texas Classic Experience is to share this post!  Please tell others that you liked this post by sharing it with your car friends by sending them a link to this page.  http://texasclassicchevyexperience.blogspot.com/


Don’t forget to visit and like Texas Classic Experience on FaceBook:  LINK to FaceBook
My winning Peal Out at the 2011 Lone Star Classic Convention in Dallas

Texas Classic Chevy Experience will post blogs about: Hot Rods, Chevy, Chevrolet, Drag Racing, Car Shows, Classic Cars, Custom Cars, Muscle Cars, How to Tech. posts, Dallas Area Classic Chevy Club, Texas Muscle Car Challenge, Tri-Five Nationals, Lone Star Chevy Convention, Classic Car lists, Classic car links, Spotters guides, Car Shows, Swap meets, Book reviews and More.

*********************
A Great Tri5 Chat Board

Sunday, June 5, 2016

Classic Car Updates Modifications That will Give you A Safer and More Enjoyable Ride Out Of Your Classic Car

Classic Car Updates
Modifications That will Give you A Safer and
More Enjoyable Ride Out Of Your Classic Car


-Alan Arnell


In years past many people wanted their classic car to be totally stock.  Some classic car guys still want that, however today’s car hobbyist is not so true blue.  The trend today is to modify your car with modern parts.  I believe this trend is taking hold because of the increased traffic and higher highway speeds.  From personal experience, I can tell you that it takes some getting use to drum brakes and a single bore master cylinder.  Many time when I first got my 1957 Chevy 150 non Bel Air 2-door sedan and I hit the brakes on a hard stop for a moment I thought I had no brakes.  Today, car brakes even in low end models are a world beyond in braking performance.  I have to admit it, that I for one am spoiled with today’s late model cars.  


IMG_8578.jpg
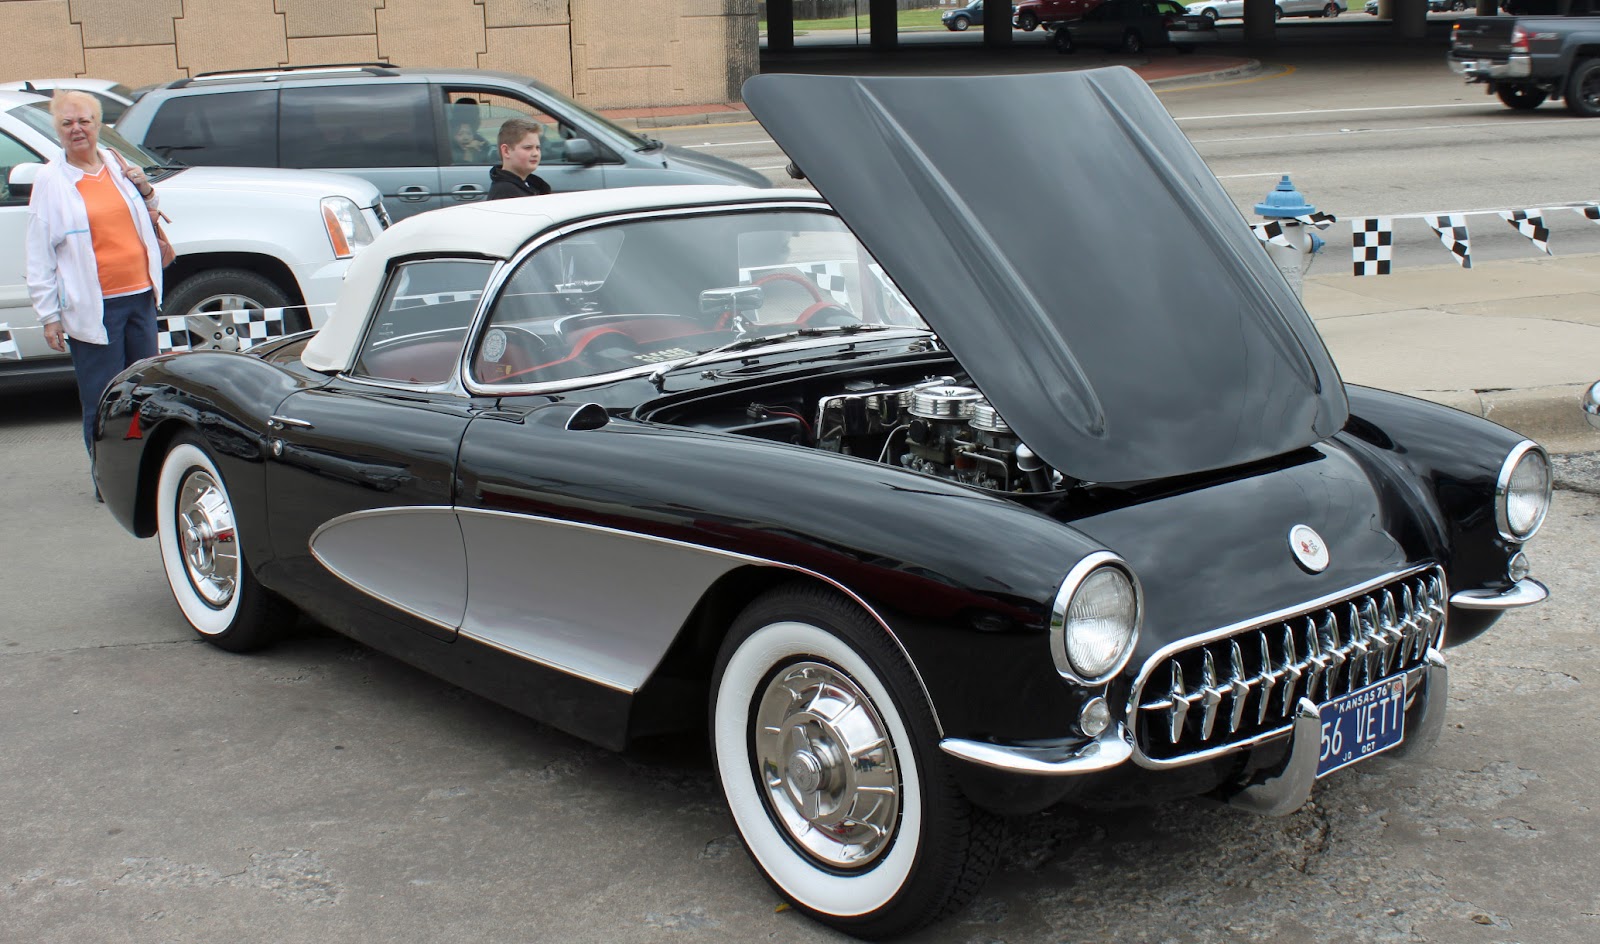
Pure stock 1956 Chevy Corvette


If you want to drive your classic car I believe you will eventually will want the comforts of a late model car.  AM radio, no air conditioning and sealed beamed headlights to name just a few items will need to be upgraded for a pleasant drive in today urban environment.  Let’s face it, it is more fun to drive your classic rather than let it set in you garage, because it is so unwielding and a pain to drive.  That’s my guiding motto anyway.  


For other like minded classic car owners who are not overly concerned with maintaining strict adherence to factory originality, there are a variety of thing that can be done to make your classic a safer and more enjoyable car to drive.  


With all I have written about in mind, here are some suggestions for making a  60 year old car more user friendly for cruising around to car shows and other classic car events.


IMG_8553.jpg
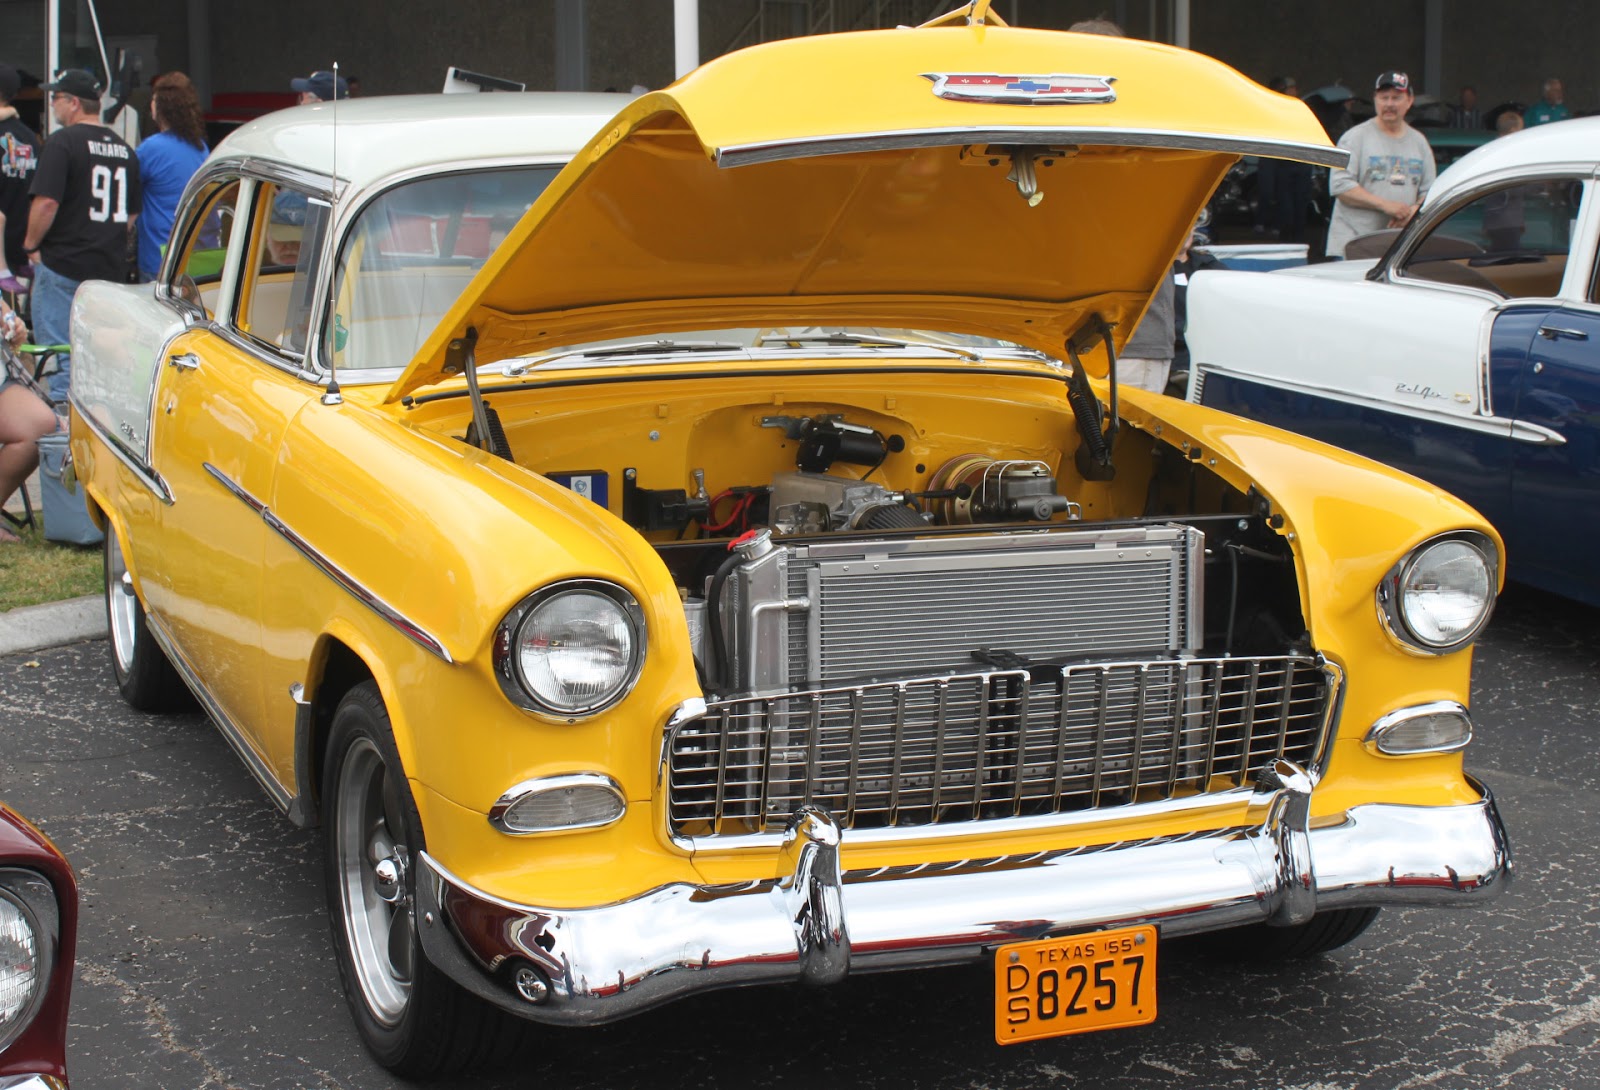
This Car Is Stock Looking On the Outside but Sports All Modern Components Underneath the Sheetmetal


Killer Tunes:  My parents were a part of the “Greatest Generation” and never bought a car with a radio until new cars would not come without them.  Ann and Arnold  just had no interest in listening to music while driving.  They bought a RV to tour the country late in their lives.  For their extended trip to explore the USA, I bought them a dozen age appropriate cassette tapes.   Years later, after they had passed away and I was cleaning out their home, I found all 12 of the tapes still unopened..  


Classic cars in the 70’s, not alone the 50’s, came equipped with terrible radios compared to anything we listen to in traffic today.  In ‘57 the radio was equipped with tubes and generally have long since died, unless extensive restoration had been made to them.  Even restored, listening to a vintage radio can be a beat down.  Listen to an AM radio station through a small single speaker in the dashboard is not what we are use to today.  Now we don’t use tapes or CD’s for our tunes. Most of us have their favorite tunes on an iPhone.  


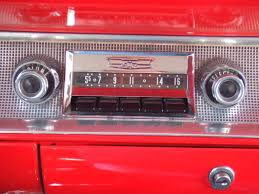
A Modern Radio and Bluetooth Unite Constructed to look Like a 1957 Stock Radio.  


Regardless of what kind of car you have, you will definitely find and enjoy a modern stereo that fits in your stock dash opening.  There are even companies that make a modern units that fits and looks like a stock unit.


Gas Shocks and Sway Bar:  Adding modern, high quality gas shock absorbers will really help to improve your classic car’s ride quality and handling characteristics.  To stop body roll a sway bar or bars may be the best handling add on you can do for your car.  


To learn about and read about my sway bars installation on my ‘57 Chevy go to LINK


Halogen Headlamps:  Putting halogen headlamps on your classic is a very simple operation.  Once the new lamps are in place you will be amazed at the improved results.  


Many classic cars have very yellow looking lights that do not do a good job of lighting up that dark road.  Halogens produce a whiter light that goes farther up the road that may give that much need reaction time.  


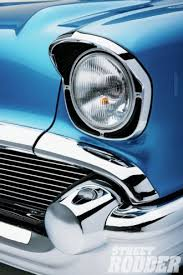
A Tricked Out 1957 Chevy Sporting Very Bright Halogen Head Lamps 


Finding halogens for your classic car is easy.  Headlamps size have been standardized from the time they switched to electric.  


Electronic Ignition:  Cars have used an electrical distributor for maybe a hundred years. However, classic were produced with a points and condenser to meter the spark to the combustion chambers.  The old points and condenser system is very much inferior to an electronic system.  The old style is not as precise and requires regular maintenance, Furthermore, their performance will get worse over time.  When I had my 1969 Chevelle, I had to change the points every six thousand miles or the car would hardly run.  


By converting your distributor to an electronic system you can improve an engine’s cold start performance, increase power output, decrease fuel consumption and reduce tailpipe emissions.  The upgrade will eliminate the need to regularly adjust dwell, timing, the points and condenser.


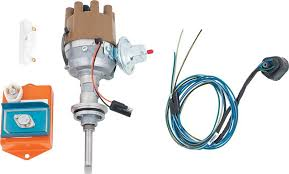
Electronic Ignition Distributor Kit For a 1955 Chevy


You may go two ways to upgrade to an electronic ignition.  The original distributor may be used and retrofitted with a simple kit.  I change over my boat and all I had to do was replace the points with the new unit and run a power wire.  Doing the retro was easy and fast. Another way to go would buy a complete distributor with an electric ignition system.   
:
Disk Brakes:  Back in the day, except for some sports cars like the Corvette, cars were equipped with four-wheel drum brakes.


The drum brake system has been around since the earliest days of car manufacturing.  The system was a tried and true inexpensive system.  Alway trying to improve, later cars automakers first introduced a front disk and rear drum brake system in the ‘70s.  Today cars generally come with four-wheel discs.  


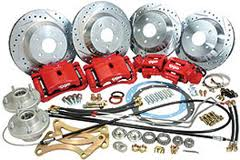
Stop on a Dime Disc Brake Conversion Kit for a 1956 Chevy


Discs brakes will give any car better stopping power.  This improved stopping power adds to the margin of safety making a safer car.  Many manufacturers produce aftermarket disc brakes that are a direct fit for you classic.  


This upgrade is more labor intensive, more costly and has a higher level of difficulty than the previous upgrades.  But, if you study, buy matching-quality parts, take your time and are not afraid to try or ask questions you should be able to complete the upgrade.


For more information about disc brake conversion on a ‘57 chevy see LINK


Air Conditioning:  If you lived in Texas you would know how hot and unpleasant the inside of a classic car can be in August.  My ‘57 has wing vent windows that will blow air on you that will make my classic at least barrable on the road.  However, the wind beating on you over a long trip can be noisy and tiring.  But then, when I stopped at a stop light I thought I would melt into butter and ooze down to the floor boards without my A/C system.  It was no fun showing up to a summer car show feeling and looking like a soggy noodle.  No deodorant will win over 120 degree heat. Who wants to stink!


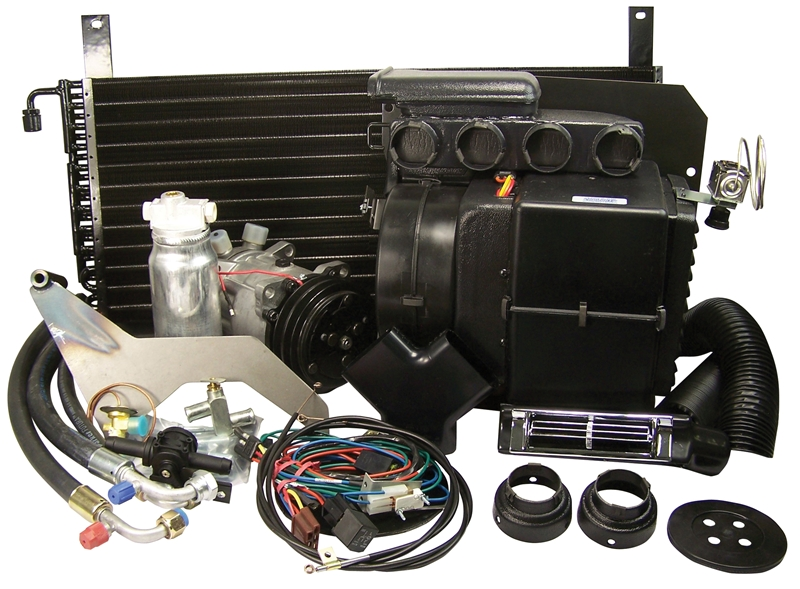
A Sure Fit A/C Kit for a Classic Chevy


For my Tri-Five, I bought a Classic Air kit.  The install is time consuming, yet besides the changing of the system not a difficult process.  The system I have is a conventional system with a compressor that is run off a pulley system.  My Perfect Fit Classic Air unit also comes with not only air conditioning,  but also has heat on the floor, and dehumidified defroster


To find out about my A/C retrofit on my ‘57 go to  LINK


Modern Engine and Transmission:  Lets face facts, the classic engine compared to a modern engine fails in comparison.  Older engines run dirtier, often smell bad, give relatively poor fuel economy, require regular maintenance such a point and plugs, are much heavier relative to their power output and require more frequent overhauls.  In the ‘50 having to do a valve job every fifty thousand miles was the norm.  I can remember watching my dad do a valve job on his 1954 Dodge under the cottonwood tree in our back yard.


While some car folks consider all of the above to be apart of the charm of a classic car, others choose to get more pleasure out of their classic car if not more power from a modern engine and transmission.  My ‘57 Chevy has a 4-speed Borg Warner and a 3.42 rear gear. When my 2009 Chevy Truck traveled at 70 MPH the engine registered 1800 RPMs. My ‘57 Chevy on the other hand turns 3200 RPM’s at the same speed.  That discrepancy in RPMs is disconcerting to say the most to say the least.  

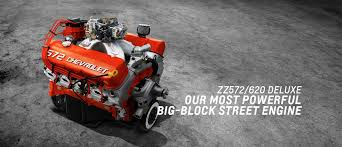
For The Lucky Few That Want Horsepower Out the Ying Yang


An engine upgrade is by far the most ambitious and costly project listed in this blog post.  


The possibilities when considering an engine and transmission update are limited only by your imagination, ability and bank account.  You could go to the extreme with a 572 CI big block or a more sedate swap.  


Regardless of how complicated or simple you choose to go, the successful completion of the installation of a modern engine and transmission will make your classic car more reliable, environmental friendly and enjoyable to drive.


Never stop driving and never stop thinking about your old classic.  I know I never will with mine.  


sdfghjkl;.JPG
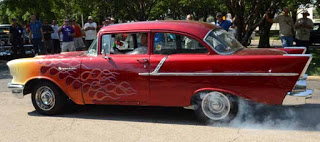
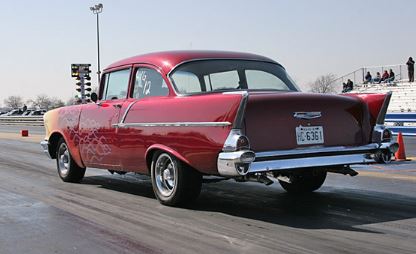
Me Drag Racing at Lone Star Dragway in Denton, Texas in my 1957 Chevy 150


!!!Support Texas Classic Experience!!!
Did you like the blog?  If you did, the best way to support Texas Classic Experience is to share this post!  Please tell others that you liked this post by sharing it with your car friends by sending them a link to this page.  http://texasclassicchevyexperience.blogspot.com/


Don’t forget to visit and like Texas Classic Experience on FaceBook:  LINK to FaceBook
My winning Peal Out at the 2011 Lone Star Classic Convention in Dallas


Texas Classic Chevy Experience will post blogs about: Hot Rods, Chevy, Chevrolet, Drag Racing, Car Shows, Classic Cars, Custom Cars, Muscle Cars, How to Tech. posts, Dallas Area Classic Chevy Club, Texas Muscle Car Challenge, Tri-Five Nationals, Lone Star Chevy Convention, Classic Car lists, Classic car links, Spotters guides, Car Shows, Swap meets, Book reviews and More.

*********************
A Great Tri5 Chat Board

Thursday, January 28, 2016

Front Wheel Alignment

Front Wheel Alignment for A Tri Five Classic Chevy After a Disc Brake Upgrade 1955, 1956, 1957 Chevrolet

   -Alan Arnell


I have been told that once I install my new Chevy disc brake parts on my 1957 Chevy that the car at low speeds will more than likely drive and turn okay.  However, I may develope a problem from the retrofit installation when driving at interstate speeds.  The common problem is that the upgraded disc brakes might make the car not want to stay in a straight line going dead ahead.  

This problem is common to the disc brake upgrade.  The main culprit is the fact that the front wheels after the installed disks will extend outward from ¾ to 1 inch from the track the drum brakes produced on each side.  The extension of the wheels away from the original turning axis will increases the distance from the turning axis.  This increases the up and down movement of the wheel and tire during turns.  


The common fix for this problem is that 2-½ to 3 ½ degrees of positive caster must be dialled in to the front suspension.   This measurement is also recommended whenever a Classic Tri Five Chevy has any late model improvements, such and disc brakes and power steering improvements.  


The movement of the upper ball joints to the rear (Positive Caster) slows the steering down and gets rid to the overly sensitive feel.  An additional extra ¼ to ½ degree may be added to the right side to compensate for the crown in the road.  

Recommended Adjustments
Caster Camber Toe In
Stock Steering Box +½ to 1 degree 0 to -1 degree ⅛” to 3/16”
605 Pwr Steering +2 ½ to 3 ½ degree 0 degrees driver ⅛” to 3/16
Box or Rack & side & -¼ passe-
Pinion Unit enger side


It is more than likely easier to take your car to an established alignment shop that understands Tri Five Chevys.  Many place don’t, so ask around.   But if you want to be a do it yourself kinda guy here are some instructions.


There are three separate adjustments to getting a proper front end alignment.  To properly position the front alignment the Camber, Caster and Toe must be set.  


Camber is when you face the front of your car then look at the front tires.  If the tips of the tires are tilted inward they have negative camber.  If the tires are tilted outward they have positive camber.
Camber will help tire-wear or destroy tires if not set correctly. Handling of the car is also determined by having the correct camber.  On the other hand, camber has little or no effect on straight-line driving.


Caster is the measurement of whether the top of the tire is adjusted forward or to the rear of the car from a side view.  Think of a peace sign,  The top line hits the top of the peace sign at zero.  If the top center is angled rearward the caster is positive.  Forward and it is negative caster.  Positive caster creates high-speed stability and turns the steering wheel during a turn back to center.  This is because a part of the vehicle weight is behind the tire.  That weight helps position the tire straight ahead.  Negative caster is where the top center is tilted forward past vertical.  Negative caster will reduce steering effort. That happens because the weight moves forward of center.  However, negative caster is not good for freeway speeds.


Toe is the amount the front tires are turned inward, like if you angle your feet in while standing.  Toe-in is where the tire is turned inward. Toe-out is when the leading edges of the front tires are angled outward as viewed from above.   Both in and out helps or hinders tire wear.  The usual spec is for a slight toe-in to compensate for normal pressure that forces tires outward as the car goes down the road.


To complete your own front wheel alignment one could use digital angle finders.  But, using this tool requires math.  So, forget that!   An easier way uses a basic bubble gauge.  Though not necessary, a turn plate will help by allowing you to perform the 20-degree turn-in and turn-out measurements of caster.  The plate are also good for toe adjustments.  With the bubble gauge attached to the wheel and leveled it will read out camber.  To change camber the upper control arm must be changed by inserting or removing shims.


Caster is the next angle to set.  Turn the tires in 20 degrees. Zero the caster reading on the gauge. Next turn the wheels 20 degrees out and the gauge will read the amount of positive or negative caster.  Positive caster is put in by either adding shims to the rear bolt or removing shims from the
front attachment point for the upper control arm. This adjustment will affect the camber, so you will have to check and set it again.


Now adjust the toe. Note: when adjusting the toe you must push the car backwards and forward about 10 feet.  Doing so will load the front tires to make for the best readings.  Toe is always set last because adjusting the camber and/or caster moves the control arms, which changes the toe. Usually the tie rods have left and right hand threads with a threaded sleeve and locking nuts to prevent the adjustment from changing.  It is best to move the left and right side adjusters the same amount until you get the correct toe-in.


Links to more Power Brake Posts:


Tri-Five Late Model Power Booster Conversion Part 1


Power Booster Conversion Tri-Five Late Model Part 2
Power to the Front
Move to a Dual Purpose MC and Disk Brakes
Front Disc Brakes for a Tri-Five Classic Chevy


Power Booster Conversion Tri-Five Late Model Part 3
Tri-Five Classic Chevy
Proportioning Valve, Dual Master Cylinder and Brake Lines


Brake Pedal Clevis Relocation After A Power Assisted Disc Brake Upgrade on a Tri Five Chevy.


Front Wheel Alignment

+++++
++++
Classic chevy, Tri-Five, Classic Car, Chevy, Chevrolet, Belair, Car show, Custom car
Muscle car,  Hot Rod, Street Rod, Drag Racing, 55 Chevy, 56 Chevy, 57 Chevy, Street Racing


!!!Support Texas Classic Experience!!!
Did you like the blog?  If you did, the best way to support Texas Classic Experience is to share this post!  Please tell others that you liked this post by sharing it with your car friends by sending them a link to this page.  http://texasclassicchevyexperience.blogspot.com/


Don’t forget to visit and like Texas Classic Experience on FaceBook:  LINK to FaceBook


Texas Classic Chevy Experience will post blogs about: Hot Rods, Chevy, Chevrolet, Drag Racing, Car Shows, Classic Cars, Custom Cars, Muscle Cars, How to Tech. posts, Dallas Area Classic Chevy Club, Texas Muscle Car Challenge, Tri-Five Nationals, Lone Star Chevy Convention, Classic Car lists, Classic car links, Spotters guides, Car Shows, Swap meets, Book reviews and More.


*********************