 |
A fine example of a 1957-150 Classic Chevy 2-door sedan, not a Belair Hardtop.Classic Car One Person Brake Bleeding |
-Alan Arnell
The classic car is a different breed than your late model car. For, the classic has no ABS or other computer added devices to aid the daily commute. When I took driver’s training in a 1973 Caprice Classic, I vividly remember my driving instructor, Coach Lauber saying , “Pump the brakes, pump the breaks!”
Brake bleeding is necessity when doing a brake job on you Classic Chevy. Unless, you like having a spongy brake pedal bleed the brakes. But the problem you may have is that you have no helper, which is sadly needed when bleeding your car’s brakes. But never fear, there is hope after all once you have learned the little tricks of the trade I will present in the text.
 |
| Rear Brake Caliper. |
After installing new pads or disks on you classic car, in the efforts of safety, one must bleed the brakes to remove the unwanted air in the lines that prevent effective brake action. However, it may help to bleed the brake lines even between brake jobs. Bleeding your brakes removes old fluid that has absorbed moisture or has had been exposure to excessive heat, and eliminates air from the system. Since air is compressible, it does not transmit pressure well. Also, brake fluid must not, to be completely successful, impact rubber parts, freeze, corrode internal components or deliver a low boiling point, therefore the condition of the fluid is critical.
How to Steps:
Fill the master cylinder with approved brake fluid. Keep the reservoir at least half-full during the bleeding. Make sure to reinstall the master cylinder lid. I learned the hard way that fluid may squirt out of an open master cylinder. My 1978 Corvette fender was splashed with brake fluid with disastrous results. Brake fluid will ruin shiny paint before you can wipe it off. If you think that the master cylinder has air or moisture in the fluid the cylinder must be belled first.
 |
| Safety First! |
- Jack up and support your car with jackstands. Block a wheel on both sides by choosing a wheel that is not being worked on, that is in contact with the floor. Be sure to shake the car to check that the stands are set correctly, before putting human body parts under the car. Remove the wheels for easier access to brake bleeders. Do not remove the brake drums. Release the parking brake. The sequence of brake bleeding is to start with the wheel farthest from the master cylinder to then proceed to the next farthest and so on. Or, the right-rear wheel first, then the left rear, right front and the left front.
- Take your dry water bottle and add enough new fresh brake fluid to create an inch or so of fluid at the bottom of the bottle, so the vacuum hose will be submerged in the fluid.
- Take the other end of the vacuum hose and install the hose to the bleeder valve nipple. Ensure, the hose has a tight fit.
- Slightly loosen the bleeder valve usually about ⅛ to ¼ turn. Leave the bleeder wrench on the valve.
- Position the bottle just below the wheel so it can be viewed while pumping the brake pedal by hand.
- With the bottle in view, slowly pump the pedal until air bubbles are no longer present. Normally, three to four strokes will be needed to purge air bubbles from the hose. With the absence of air bubbles coming from the hose during pumping, pump three to five additional strokes to ensure the lines are purge the old fluid out of the caliper or wheel cylinder. When finished removing old fluid and air, retighten the bleeder valve.
- Top off the master cylinder with new brake fluid. Note: If you have to pump several strokes on one wheel you may need to add fluid to the master cylinder before moving on to the next wheel. Always maintain fluid in the master cylinder. If the master cylinder runs dry, air will enter the brake system and the process will need to be repeated.
- Bleed all four wheels. Remember to check the master cylinder fluid level after each wheel is bled. Ensure all bleeder valves are shut immediately after bleeding. Note: Flushing the entire system usually requires about one quart of brake fluid.


!!!Support Texas Classic Experience!!!
Did you like the blog? If you did, the best way to support Texas Classic Experience is to share this post! Please tell others that you liked this post by sharing it with your car friends by sending them a link to this page. http://texasclassicchevyexperience.blogspot.com/
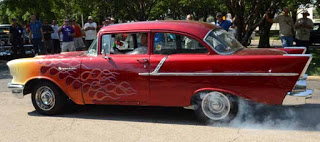
My winning Peal Out at the 2011 Lone Star Classic Convention in Dallas
Texas Classic Chevy Experience will post blogs about: Hot Rods, Chevy, Chevrolet, Drag Racing, Car Shows, Classic Cars, Custom Cars, Muscle Cars, How to Tech. posts, Dallas Area Classic Chevy Club, Texas Muscle Car Challenge, Tri-Five Nationals, Lone Star Chevy Convention, Classic Car lists, Classic car links, Spotters guides, Car Shows, Swap meets, Book reviews and More.
*********************
A Great Tri5 Chat Board
No comments:
Post a Comment
Note: Only a member of this blog may post a comment.