Part 4
How to charge your Classic Car's A/C System
Retrofit A/C "Hillbilly, How To"
Reflections of My Experiences of Installing A/C in My Classic Tri-Five 1957 Chevy
 |
| All put together ready for a charge of 134a |
If not done correctly, charging your A/C system, yourself, you run the risk of causing problems with the system. Thus it is the recommendation of: If in in doubt hire a qualified and certified A/C Tech. Still, if you are careful and understand the procedures while completing required steps you may charge the system yourself.
The following Tech Steps are based on how to charge your Classic Auto. with 134a.
How an A/C Works
An A/C system has several parts to consider. Those parts are the condenser, compressor and the evaporator.
 |
| My unit is running a little hotter that I liked. Later, I replace a hose.and recharged the system |
The condenser and the evaporator are really two radiators hooked in a loop. All A/C systems are sealed from the outside. The inside of the A/C has a fluid refrigerant inside, that refrigerant I am using in my CAA system is 134a. The compressor takes the 134a at low pressure and compresses it. This compression produces heat. The compressor then sends the compressed 134a to the condenser. The condenser dissipates the heat to the outside world. After passing through the condenser the refrigerant now a liquid travels to the evaporator in the passenger compartment.
While the refrigerant goes through the evaporator the liquid is allowed to expand removing the heat and cools the evaporator. A fan pushes air through or over the evaporator producing cool air for your driving pleasure. That is why the whipped cream can gets cold when you are making a Sunday.
It is important to know that this cycle of hot and cold when subjected to moisture, the moisture will damage parts of the system. If your A/C system ever springs a leak do not wait to get it repaired. If you wait, moisture will get into the system causing a more costly repair job.
Evacuate the System
To start the charging routine you must first draw a vacuum or so called, evacuate the A/C system. This vacuum is important to properly fill the system with refrigerant. Evacuating removes the moisture and other contaminants. The vacuum also aids in adding oil, if needed, and refrigerant.
In the Classic Air retrofit project, that I am writing about, the put together project needs refrigerant to work. Before the refrigerant can be put in the system a vacuum pump must be used to evacuate the system. If there was refrigerant in the system you should evacuate the system with a capture unit to keep refrigerant out of the atmosphere. Doing so keeps that nasty hole in the oxone smaller.
Note - Charging an A/C system involves toxic chemicals that are under high pressure: Know what you are doing before performing any A/C work. BE SAFE & KNOWLEDGEABLE!
Tools You Will Need
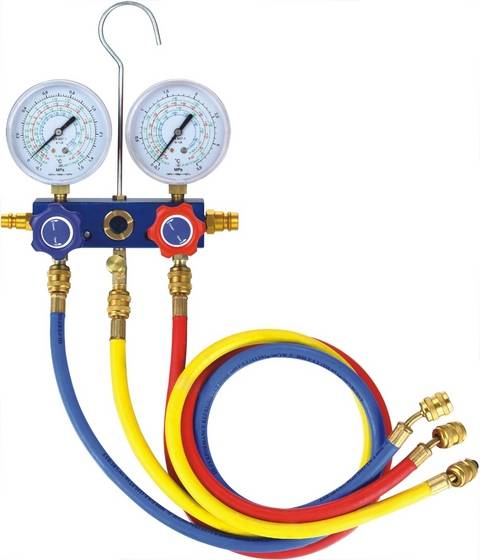
Manifold gauges
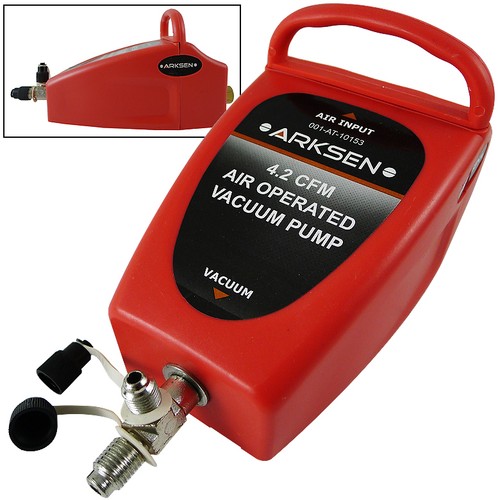
Vacuum pump
Small thermometer
How to Tech: Charging an A/C System
- Evacuate your A/C unit, but first check all the fittings for tightness again
- Connect the manifold gauges
- identify the high pressure side
- identify the low pressure side
Manifold Hose/Line identification and Use
- The high pressure side uses the blue hose
- The red hose is for the high pressure side
Typical Manifold Gauge Set - The yellow hose is the service line, the service line is use to pull out and put in what you want in the system
- At this point you could purge the system with compressed nitrogen. Most shade tree guys don't have this equipment and getting access to it is rare. However this process can be skipped. Deep vacuuming the system will get rid of the moisture and check for leaks.
- Attach the yellow service line to the vacuum pump with the high and low sides of the manifold closed.
- With the pump running open both the high and the low sides of the manifold gauges.
- Check for leaks by using the low side gauge indicator. That indicator shows both pressure (PSI) and NS vacuum (in/hg). If the needle does not go below zero, you have a leak in the system.
- If the needle is below zero let the pump run for five minutes. After five minutes close the high side valve and turn the pump off.
- Note the reading on the low side gauge
- After another five minutes of waiting if there is a decrease in the gauge you have a leak. Stop and fix your leak before proceeding
- With all leaks stopped, restart the pump
- Open the high side valve again
- Run the pump for thirty minutes or how long the pump's instructions tell you to evacuate.
- With the system evacuated close both the high and low valves.
- Turn off the pump
- If done correctly all air and moisture is now out of the A/C system
Adding Oil
- Remember if you are installing a new CAA unit the oil has already been put in the compressor for you
- However, if working on another system that needs oil here is a how to put oil in the system
Tapping Valve - Note: If you are repairing an existing A/C system you will need to drain all the old oil out of the compressor and replace the dryer, Measure the correct amount of oil your system requires.
- If you have the compressor off you can simply pour the oil into them.
- If the compressor and the dryer is in place you can use the evacuated system’s vacuum to draw the oil in the system Now let us go back to the CAA steps
- With the engine off connect a can of oil to the manifold system by first attaching the tapping valve attachment to the service line.
- Open the valve on the oil can and crack open the service line at the manifold until oil leaks out to purge air out of the service line
- Holding the oil can and valve upside down, open the low side valve, the vacuum will draw oil into the system
- When the can is emptied, close the low side valve and the valve on the can, remove can

Charge the System with Refrigerant
- Start the engine
- Place the A/C controls on the dashboard to high and the fan to low
- Let the engine idle for five minutes to get the pressures and temperatures to their correct levels
- While waiting for the engine to warm up - connect a can of refrigerant to the tapping valve connected to the service line
- Turn the A/C fan on high
- Purge the service line by cracking open the service line nut at the manifold until all unwanted air leaks out the the service line
- Open the low side valve on the manifold
- Hold the can upside down, this will help put the refrigerant in as a liquid
- Note: Never open the high side valve at this point of charging
- When the can is empty, shut the low side valve, then shut the can valve, remove the spent can
- Depending on the size of the A/C unit you may have to use two or three cans.

High and Low Manifold Gauges Check your gauges for a full charge- Run the fan on high with all the windows open. The engine should be set to 1500 RPM
- To read the gauges a good rule of thumb with 134a is that the high pressure (PSI) should be about 2.2 to 2.5 the outside air temperature, for example say it is 90 degrees F in your work area. your gauges should not read higher than 225 (PSI)


Next time I will discuss how to “Troubleshoot an Auto Air Conditioner With Manifold Gauges.”
Please check back for the rest of the story.
Alan
No comments:
Post a Comment
Note: Only a member of this blog may post a comment.