
Classic Air Perfect Fit Air Conditioner InstallRetrofit A/C "Hillbilly How To"Reflections of My Experiences of Installing A/C in My Classic Tri-Five 1957 Chevy
-Alan Arnell
In this blog, I will discuss my experiences of installing a Classic Air retrofitted in-dash A/C unit into my Classic Car 1957 candy-apple red-sedan-non-BelAir-150. This blog is in addition to the steps that you would be better for by downloading from where you purchased A/C from. I will give you my reflections, tips and understanding of the instructions produced by Classic Auto Air for a ‘57 Chevy. The directions for the ‘55 Chevy and ‘56 Chevy are slightly different. Here is a link to the full instructions from the vendor I chose, Classic Auto Air.com. (CAA)

There are other vendors out there like Vintage Air and so on, but I chose CAA for my own personal reason explained in my last blog Global Warming the Ozone & Your Classic Chevy Tri-Five A/C Unit New Mobile Air Conditioner Refrigerant Standards . All retrofit A/C units available on the market have their plusses and minuses. It all boils down to a matter of preference by the customer. This customer chose CAA and would recommend them to other Classic Car enthusiasts.
As follows is another example to why I recommend CAA . I had successfully used my unit for several years when I broke the bolt that holds the compressor to its bracket. The breaking bolt was of no fault of the CAA unit. The fault lies with my faulty harmonic balancer. My SBC engine has a crankshaft from a 400 CI engine. As you may know the 400 motor is not internally balanced. A faulty harmonic balancer really causes problems with vibration, more so with a 400 sbc crank.
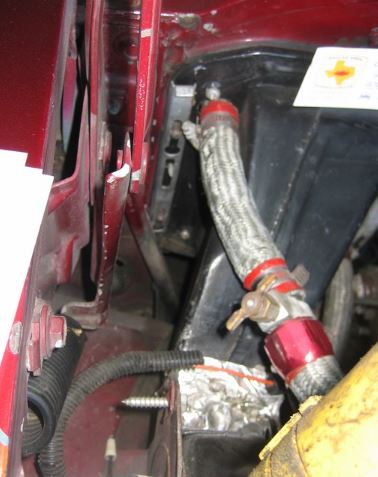
When I went to CAA for a replacement bolt, to my surprise and joy I was greeted by the same salesperson that I purchased the unit from many years before. I live close to CAA's Grapevine, Texas store. To save costs on shipping, I went in person to buy my A/C unit instead of mail order. I guess for that reason, the salesperson remembered me. How often does that happen? Even better CAA gave me the replacement bolt at no cost!
Like I said, I installed my A/C unit several years ago. After learning of a new A/C refrigerant on the horizon, I went back to my notes from when I completed the retrofit A/C project on my car. After reading my notes I decided to blog my experiences along with a set of abbreviated "how to steps".
I recommend you first read the installation instructions provided by CAA. However, as I have written before, you only really remember about twenty percent of what you read. To help you remember the steps better, go over my steps as well as looking at CAA’s before you tackle the retrofit. Even with prior study you will have to print out the instructions from CAA and keep them close, to check over and over, The the project is too vast with too many steps to memorize them all successfully. That being said, with a can do attitude, a will to follow directions and slightly better than average mechanical skills you will complete your A/C install triumphantly.
Tech How To Steps
1. Choose your vendor, make the $$$ to buy the unit, then buy your new project
2. When opening the boxes check to see if you received all the components in the box. And, be sure you know what each parts function is and how to identify the part by name.
a. Evaporator
b. face Duct Assembly
c. Flex hoses 2'' dia. x 3' and 2" dia. x 4'
d. Sack Kit Hardware
e. Sack Kit Control (2)

f. Glove Box
g. Firewall Block off
3. Important Info: You will need to have good motor mounts before installation, the electrical system must be in good working order, always use oil on "O" rings, threads, and rear bump, (I did not know about oiling the threads and had a leak), disconnect the battery, always use two wrenches to tighten fittings, shaft seals may take three to four hours to seal completely, no need to add oil, it is already in the compressor from CAA, turn the compressor fifteen to twenty times, 360 degrees, before charging the system and don't be afraid to call the "Tech Help Line" for problems. Gibb's rule 28: If you need help, ask for it!

4. Remove the glove box. The old box will be too large due to the size of the unit you will install under the dash. They give you a smaller box made of plastic as a replacement. I had to move my owners manual, spare fuses, etc. to a box in the trunk. Note: With this project and all projects, take pictures of everything that you are going to take apart. You might even take notes or how the item came apart and in what order. Saves time later. Bag and label each part removed. Make a place to organize and store removed items and purchased items. Try to keep all items in one area.
5. Drain the radiator and please recycle.
6. Remove heater hoses from heater coil, throw away the old used clamps (CAA gives you new hardware with the kit. I say use new hoses as well
.
7. Remove the heater box releasing brackets, keep the holding bracket, Sh!7 can the heater core
8. Remove and discard the blower assembly, keep the brackets. (You will put a cap over the passenger vent tube. I have thought it would be cool to use the now inoperable vent tube as a air scoop to the carburetor.)
9. Behind the glove box take off and discard the defrost cable
10. On top of the heater box is the electrical resistor connection, disconnect it


12. Disconnect the fresh air cable under the hood on the vent tube. keep cable and hardware
 13. Back in the car pull the cable you just unhooked. Keep the firewall grommet it went through.
14. Remove and discard the fresh air vent grill. (My '57/150 did not have the grills. I have wondered if the 150's even had them, hence the 150 was so Spartan. )
15. Remove the four screws and the heater control. Note: Label the power wire to the fan control switch, you will need to find and use the wire later.
16. Install the new provided vent cable and pull (I omitted the cable. My vent felt on the damper was shot and omitted hot and cold Texas air even in the closed position. Someday when I fix the damper I will install the cable. Oh! That's right, I use the cable to fix my lawn mower throttle cable!)
(Link to Part 2) "Classic Air Perfect Fit Air Conditioner Install"

!!!Support Texas Classic Experience!!!
Did you like the blog? If you did, the best way to support Texas Classic Experience is to share this post! Please tell others that you liked this post by sharing it with your car friends by sending them a link to this page. http://texasclassicchevyexperience.blogspot.com/

My winning Peel Out at the 2011 Lone Star Classic Convention in Dallas
Texas Classic Chevy Experience will post blogs about: Hot Rods, Chevy, Chevrolet, Drag Racing, Car Shows, Classic Cars, Custom Cars, Muscle Cars, How to Tech. posts, Dallas Area Classic Chevy Club, Texas Muscle Car Challenge, Tri-Five Nationals, Lone Star Chevy Convention, Classic Car lists, Classic car links, Spotters guides, Car Shows, Swap meets, Book reviews and More.
*********************
A Great Tri5 Chat Board

No comments:
Post a Comment
Note: Only a member of this blog may post a comment.