How to Change the
Oil in Your Classic Car
Five Parts: Jacking up the Vehicle Draining the Oil Replacing the Oil Filter Adding New Oil Disposing of Oil Community
Regularly changing your car's engine oil and filter is one of the most important things you can do to keep your car running well. Over time, your oil will break down and your filter will become clogged with contaminants. Depending upon your driving habits and type of vehicle, this may take as few as 3 months or 3,000 miles (4,800 km), or be as long as 20,000 miles (32,000 km) or 24 months (consult your owner's manual for service intervals). Fortunately, changing your oil is both easy and inexpensive, so the sooner you change the oil in your car if it needs it, the better.
Part 1
Jacking up the Vehicle
1. Pull the car into a driveway or space with level ground and enough working area.
Let the car idle for 5-10 mins to get the oil warm.Be sure to exercise caution when draining warm or hot oil.
2. Place car in park, remove the keys and apply the parking brake. Exit the vehicle.
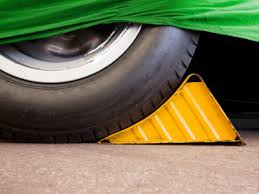
3. Install wheel chalk/blocks to restrain tires. Tire restraints (wheel blocks) should be placed on the tires that will remain on the ground.
4. Locate the jacking points on the vehicle. If you are unsure, check the owners manual for specifics.
5. Jack up the vehicle.
You will only need to do this on one side.
6. Place jack stands on jacking points.
7. Restrain the vehicle. Apply force by rocking the vehicle to assure it is safe.
Part 2
Draining the Oil
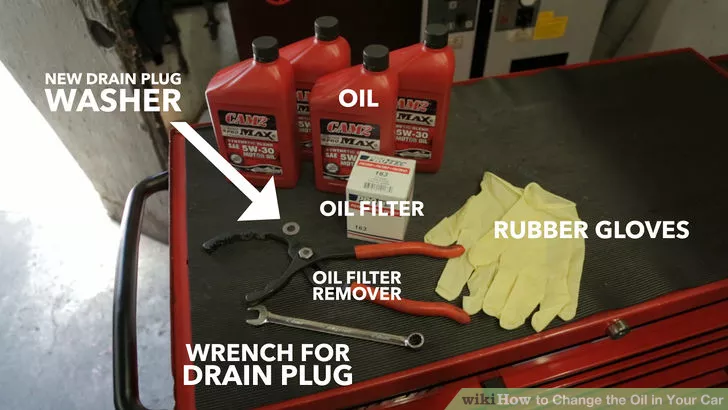
1. Gather your supplies. You will be needing the appropriate oil filter and new clean oil for your vehicle.
2. Remove the oil cap. Open the hood and locate the oil cap on top of the engine. Find the oil pan. Under your car, look for a flat metal pan closer to the engine than the transmission.
Locate engine drain plug. Verify that is the engine oil drain plug, not the transmission drain plug. If you are unsure which is which, look for the exhaust. The exhaust is always attached to engine, as is the tube that travels from the front of the vehicle to the back. The oil pan and drain plug will be located below the engine.
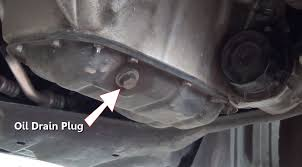
4. Remove the oil plug. Loosen the plug counter-clockwise using the proper sized socket or a crescent wrench if you have room to maneuver. You should also remove and replace a paper or felt drain plug gasket. A metal washer can be re-used in good condition.
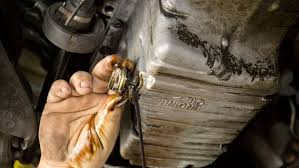
5. Wait. It will take several minutes for all the oil to drain out of the car. When the oil has ceasing running out of the crankcase, replace the plug. Put new washer on the drain plug. Inspect and clean 3 areas: drain, plug, and gasket. Put the new gasket on the drain plug.

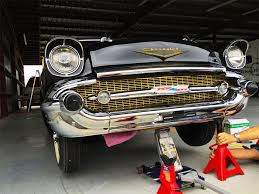
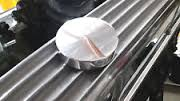
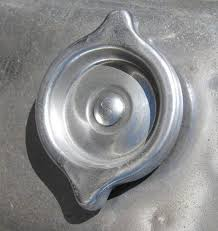
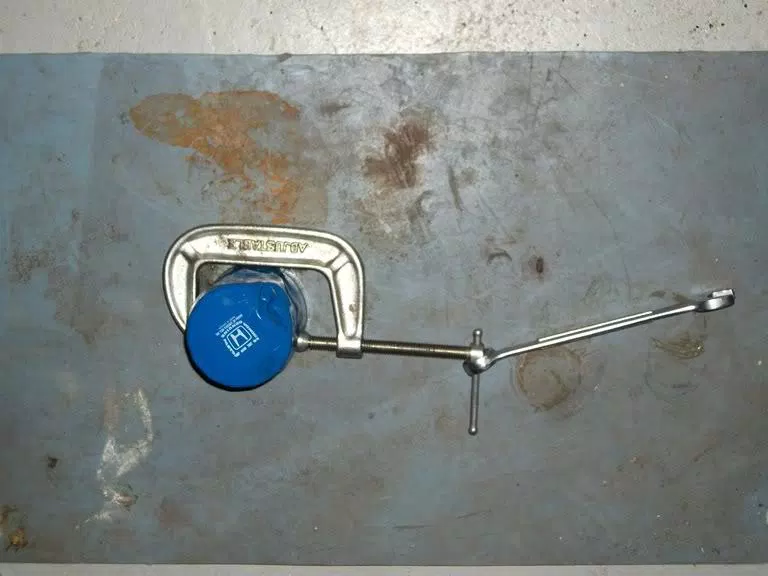
External oil filter canister on a ‘55 Chevy engine.
Part 3
Replacing the Oil Filter
1. Locate the filter assembly. Filters are not put in a standard position, so they can be on the front, back or side of the engine depending on the model.
Look at the replacement filter you purchased to have some idea of what to look for. Typically, they're white, blue, or black cylinders about 4–6 inches (10.2–15.2 cm) long and 3 inches (7.6 cm) wide, like a soup can.
Some vehicles such as BMW, Mercedes, and newer Volvos may have a filter element or cartridge as opposed to the simpler spin-on type. They require you to open the cap of a built-in reservoir and lift out the filter element itself.

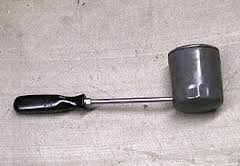
2. Unscrew the oil filter. First, try by hand to get a good grip and twist slowly and steadily, counter-clockwise. If you are unable to remove the filter by hand, you will need an oil filter removal tool to do this. Make sure the drain pan is underneath the filter before fully removing the filter. This will help prevent spillage.
To avoid spilling too much oil as you remove the filter, you can wrap a plastic bag around the filter, which will catch any oil that escapes as you remove it. Let it sit upside down in the bag to drain as you complete the job.
Make sure the pan is still under the car catching the spilling oil. There will be some trapped in the filter that will come out when you unscrew it.

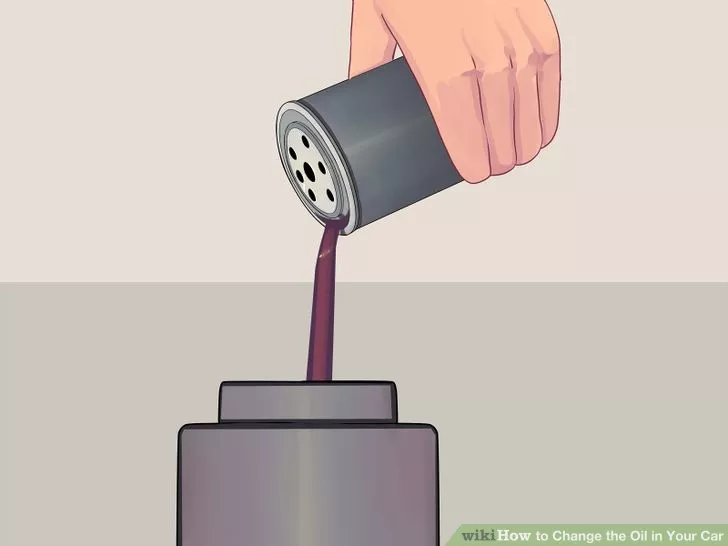
3. Prepare the new filter. Dip the tip of your finger in the new replacement oil and smear it on the gasket ring of the new filter. This will lubricate the gasket and create a good seal for the new filter, and ensure that you'll be able to get it off the next time.
You can also pour a tiny amount of oil into the filter prior to installing it. This will reduce the amount of time your car takes to regain proper oil pressure. If your filter is mounted vertically, you may be able to fill it almost to the top. If mounted at an angle then a small amount of oil will spill just prior to spinning the filter on.

4. Carefully screw on the new, lubricated filter, being careful to not cross the threads. The filter will generally say how tight to tighten it; look to the specifications on the box for more specific instructions. In general, you'll tighten the filter until the gasket touches, then a quarter-turn more.

Part 4
Adding New Oil
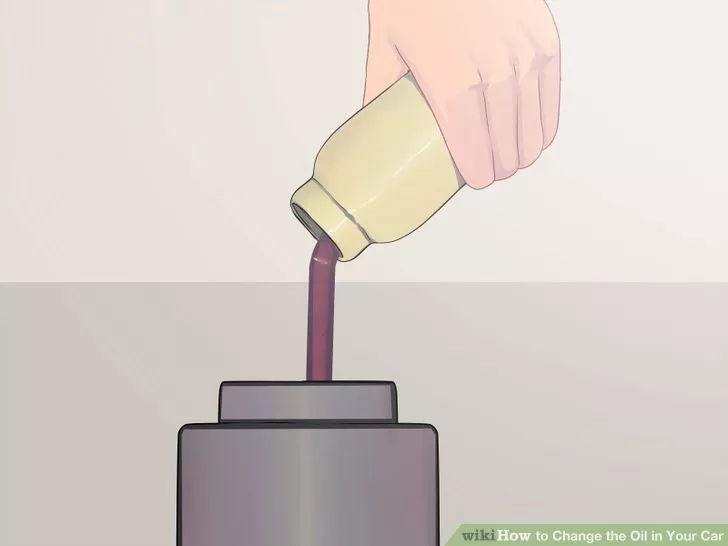
1. Add new oil to the car at the fill hole. The amount you need is in the owner's manual, usually listed under "capacities."
If you hold the bottle with the spout on top, it will pour more smoothly, without bubbling.
Make sure you're adding the correct oil. Typically, you can safely add 10W-30 to most cars in a pinch, but you should consult your owner's manual or the experts at an auto shop before adding oil.
Don't always rely on the dipstick for an accurate measurement; it can be off, especially if the engine has just been run (the stick will read low because there is still oil in the galleries). If you want to check the stick accurately, just check it first thing in the morning, parked on a level surface, when it's cold and settled.
2. Replace the fill cap. Check around for any loose tools you might have left around and close the hood.
Look under the car to make sure nothing is leaking. It's a good idea to wipe up any spills as best you can. While it's not dangerous to get a little oil on the crankcase as you're pouring, it may smoke as the engine heats up, leading to that burning oil smell that can be momentarily frightening. It can also make your interior smell bad.
3. Start the engine. Watch to be sure the oil pressure light goes off after start-up. Put your car in park or neutral with the parking brake on to check for any drips and look carefully under the car to check for any leaks or drips. If the filter and drain plug aren't tight, they may leak slowly. Run the engine for a minute or so to get the pressure up and ensure you've installed everything correctly.
Optional: Reset the oil change light. This will differ depending upon the make and model of your car, so you should consult the owner's manual to figure out the specific set of steps. On most GM cars, for instance, you'll need to shut the car off and then turn the ignition on without turning the car over. Next, pump the gas pedal three times in ten seconds. When you start the car back up, the lights should be reset.

4. Check oil levels by pulling out the dipstick. Once vehicle has been turned off again and the oil has settled for 5 to 10 minutes, recheck the dipstick to ensure that the levels are where they need to be.


Part 5
Disposing of Oil
Who wants used oil and batteries? We do! AutoZone recycles used oil and batteries in most stores.
At AutoZone, as with most auto parts stores, want to help you to protecting the environment by providing drivers with a safe and easy way to dispose of used oil and batteries. Every AutoZone store accepts used batteries for recycling and 95% of our stores accept used motor oil. See your closest AutoZone store for details. Last year, AutoZone recycled millions of batteries and 9.5 million gallons of oil. That's more than any other retailer in America. Get in the Zone and recycle today.
*Oil recycling not available in Alaska
1. Transfer the oil to a sealing container. Now that you've changed your oil, get the sludgy gunk into a more permanent container. Adding it to the new container you've just emptied is the safest bet. Use a plastic funnel in the bottle and pour slowly to ensure you don't spill any. Clearly mark the bottle "used oil" so you don't mistake it for the real thing.
Other options include old milk jugs, windshield washer-fluid jugs, or other plastic bottles. Be very careful anytime you're using old food bottles to clearly mark it.
Don't put old oil in containers that held chemicals like bleach, pesticides, paint, or antifreeze. These will contaminate the recycling process.
2. Make sure your oil filter is drained. You can add this oil (sometimes as much as 8 oz.) to the old oil. Filters are also recyclable, so hang onto them.
3. Find a designated collection site in your area. Typically, all places that sell motor oil will have this information on hand. Retailers that sell more than 1,000 filters in a year are required to accept old filters. Many service stations that do oil changes will also take your used oil, though sometimes for a small fee.


Tips
- Consider having a green, eco-friendly oil absorbent product on hand in case you spill some oil. They will absorb oil and will keep your garage and driveway clean. Kitty litter or clay-based products are not effective solutions for this. You can find a wide variety of eco-friendly oil absorbent products online. They are extremely absorbent, easy to use and renewable.
- Use disposable nitrile gloves. Used motor oil contains many toxic contaminants and can be easily absorbed through your skin.
- There are some oil drain valves on the market that replace your normal drain pan bolt. These can make oil changes much more convenient and can reduce the amount of mess you make.
- For a very stubborn filter, using a hammer and a large screwdriver as a sort of "chisel" can push the filter counter-clockwise. Be advised: once you punch hole in this thin filter wall, the engine cannot be started until it's replaced.
- To avoid getting oil all over your arm when removing the drain plug bolt, apply inward force (as if you are trying to push the plug back into the hole) while removing it. When you know that bolt is fully unscrewed, quickly pull it away from the opening. If you're lucky only a few drops will get on your hand. Tie a rag around your wrist when you remove the oil plug.

!!!Support Texas Classic Experience!!!
Did you like the blog? If you did, the best way to support Texas Classic Experience is to share this post! Please tell others that you liked this post by sharing it with your car friends by sending them a link to this page. http://texasclassicchevyexperience.blogspot.com/

My winning Peel Out at the 2011 Lone Star Classic Convention in Dallas
Texas Classic Chevy Experience will post blogs about: Hot Rods, Chevy, Chevrolet, Drag Racing, Car Shows, Classic Cars, Custom Cars, Muscle Cars, How to Tech. posts, Dallas Area Classic Chevy Club, Texas Muscle Car Challenge, Tri-Five Nationals, Lone Star Chevy Convention, Classic Car lists, Classic car links, Spotters guides, Car Shows, Swap meets, Book reviews and More.
*********************
A Great Tri5 Chat Board