Showing posts with label Classic repair. Show all posts

Saturday, June 11, 2016

Classic Car One Person Brake Bleeding


A fine example of a 1957-150 Classic Chevy 2-door sedan, not a Belair Hardtop.

Classic Car One Person Brake Bleeding

  -Alan Arnell


The classic car is a different breed than your late model car.  For, the classic has no ABS or other computer added devices to aid the daily commute. When I took driver’s training in a 1973 Caprice Classic, I vividly remember my driving instructor, Coach Lauber saying , “Pump the brakes, pump the breaks!”


Brake bleeding is necessity when doing a brake job on you Classic Chevy.  Unless, you like having a spongy brake pedal bleed the brakes.  But the problem you may have is that you have no helper, which is sadly needed when bleeding your car’s brakes.   But never fear, there is hope after all once you have learned the little tricks of the trade I will present in the text.


Rear Brake Caliper.


After installing new pads or disks on you classic car, in the efforts of safety, one must bleed the brakes to remove the unwanted air in the lines that prevent effective brake action. However, it may help to bleed the brake lines even between brake jobs.  Bleeding your brakes removes old fluid that has absorbed moisture or has had been exposure to excessive heat, and eliminates air from the system. Since air is compressible, it does not transmit pressure well.  Also, brake fluid must not, to be completely successful, impact rubber parts, freeze, corrode internal components or deliver a low boiling point, therefore the condition of the fluid is critical.  


How to Steps:


Fill the master cylinder with approved brake fluid.  Keep the reservoir at least half-full during the bleeding. Make sure to reinstall the master cylinder lid.  I learned the hard way that fluid may squirt out of an open master cylinder.  My 1978 Corvette fender was splashed with brake fluid with disastrous results.  Brake fluid will ruin shiny paint before you can wipe it off.  If you think that the master cylinder has air or moisture in the fluid the cylinder must be belled first.


zzzzzzzzzZZZzzzzzzzzzzzzxxxxxxxxx.jpg
Safety First!

  • Jack up and support your car with jackstands.  Block a wheel on both sides by choosing a wheel that is not being worked on, that is in contact with the floor.  Be sure to shake the car to check that the stands are set correctly, before putting human body parts under the car. Remove the wheels for easier access to brake bleeders.  Do not remove the brake drums. Release the parking brake. The sequence of brake bleeding is to start with the wheel farthest from the master cylinder to then proceed to the next farthest and so on.  Or, the right-rear wheel first, then the left rear, right front and the left front.
  • Take your dry water bottle and add enough new fresh brake fluid to create an inch or so of fluid at the bottom of the bottle, so the vacuum hose will be submerged in the fluid.
  • Take the other end of the vacuum hose and install the hose to the bleeder valve nipple.  Ensure, the hose has a tight fit.  
  • Slightly loosen the bleeder valve usually about ⅛ to ¼ turn.  Leave the bleeder wrench on the valve.

  • zzzzzzzzzZZZzzzzzzz.jpg
  • Position the bottle just below the wheel so it can be viewed while pumping the brake pedal by hand.  


  • With the bottle in view, slowly pump the pedal until air bubbles are no longer present. Normally, three to four strokes will be needed to purge air bubbles from the hose.  With the absence of air bubbles coming from the hose during pumping, pump three to five additional strokes to ensure the lines are purge the old fluid out of the caliper or wheel cylinder.  When finished removing old fluid and air, retighten the bleeder valve.  

  • zzzzzzzzzZZZzzzzzzzzzzzz.jpg

  • Top off the master cylinder with new brake fluid.  Note:  If you have to pump several strokes on one wheel you may need to add fluid to the master cylinder before moving on to the next wheel.  Always maintain fluid in the master cylinder.  If the master cylinder runs dry, air will enter the brake system and the process will need to be repeated.

  • zzzzzzzzzZZZ.jpg

  • Bleed all four wheels.  Remember to check the master cylinder fluid level after each wheel is bled.  Ensure all bleeder valves are shut immediately after bleeding.  Note:  Flushing the entire system usually requires about one quart of brake fluid.


!!!Support Texas Classic Experience!!!
Did you like the blog?  If you did, the best way to support Texas Classic Experience is to share this post!  Please tell others that you liked this post by sharing it with your car friends by sending them a link to this page.  http://texasclassicchevyexperience.blogspot.com/


Don’t forget to visit and like Texas Classic Experience on FaceBook:  LINK to FaceBook
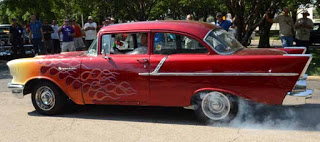
My winning Peal Out at the 2011 Lone Star Classic Convention in Dallas

Texas Classic Chevy Experience will post blogs about: Hot Rods, Chevy, Chevrolet, Drag Racing, Car Shows, Classic Cars, Custom Cars, Muscle Cars, How to Tech. posts, Dallas Area Classic Chevy Club, Texas Muscle Car Challenge, Tri-Five Nationals, Lone Star Chevy Convention, Classic Car lists, Classic car links, Spotters guides, Car Shows, Swap meets, Book reviews and More.

*********************
A Great Tri5 Chat Board

Tuesday, June 7, 2016

The Special Tools the Car Hobby Guys Need in His Home Shop

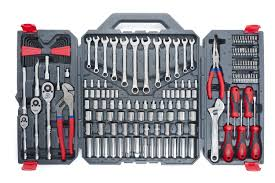
If you can use your tools and keep you tool set looking
 like the above example you are a better man than me!

The Special Tools the Car Hobby Guy Needs in His Home Shop

-Alan Arnell

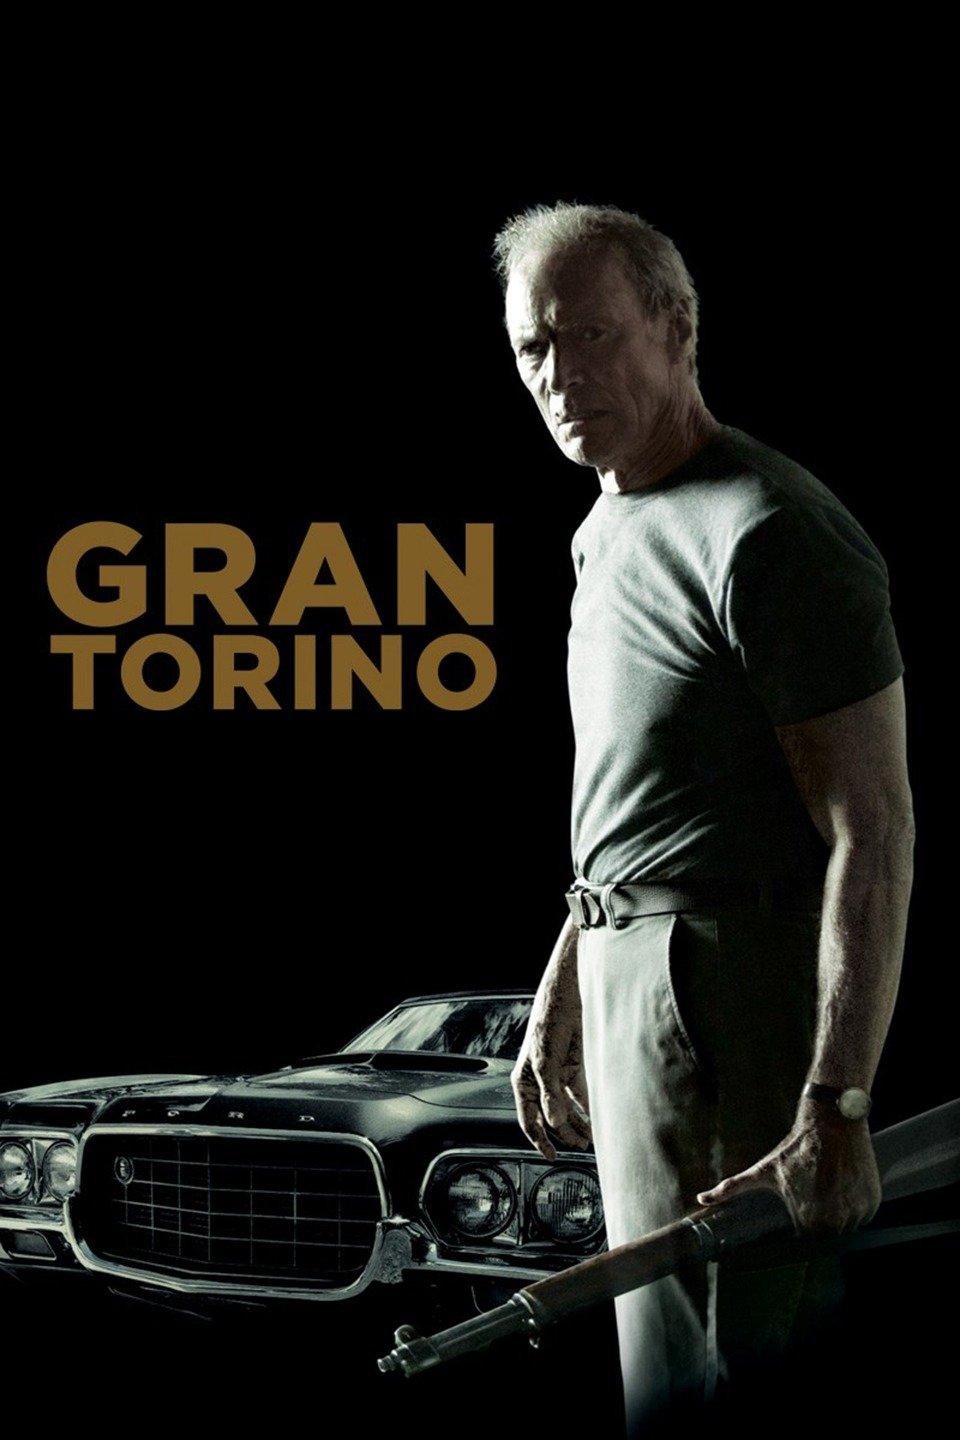
In the movie “Gran Torino” starring Clint Eastwood, Walt Kowalski,(Clint Eastwood) gives his new young neighbor and protege Thao (Bee Vang) a starter kit of tools.  They were a can of WD40, vice grips and roll of duct tape. Walt says, “Any man worth his salt can fix almost any problem with this stuff alone.  If there is anything else you need just go out and buy it.”  Thao looks at all of Walt’s tools in his garage workshop.  Thao sadly comments, “I will never be able to put together such an impressive collection of tools.”  Walt says, “You don't buy all these tools at once, it’s something a man accumulated over 50 years.


If you are just starting out or been at the restoration car hobby you know that you will need a good set of tools. Tools make the job easier.  Most certainly a good mechanic can make and make do in a pinch with a tool substitute.  For example, when I was 19 I had to change the brake shoes on my 1969 Chevelle on a Friday night to be able to drive to Chicago to see my girlfriend who is now my wife of 36 years.  I never throw anything away.  

The trip scheduled was a 300 miles round trip.  Of course driving home from work earlier that day I had stepped on the breaks and heard a grinding noise.  I had been ignoring the squealer warning devices for quite some time due to my financial situation.  Still, I was afraid to drive that far with grinding brakes.  

7851_USER_PROFILE__230x230.jpg

When I got home all the auto parts stores were closed.  For a quick fix, I remembered my friend Ron had just done a brake job on his 1968 Chevelle.  I went to his house and he had not thrown away the old brake shoes.  I garbage picked the shoes for my car.  In the middle of the night I put the springs on the brake assembly with screwdrivers, needle nose plyers and vice grips.  Those tools did the job but at a great loss of time and loss of mental health.

Buying and obtaining tools is one of the few manly joys left in this world.  I enjoy getting new tools.  I am of the sort that I mainly do not go out and buy snap on or other high quality tools. If you are a professional mechanic, I believe you should have the best tools.  Tools to a professional are their bread and butter.  You want the best tool to do the job and a tool that will last a long time giving a good return on your investment.


Me, I’m a hobbiest.  I buy the cheapest tools I can find.  Really, I like to buy my tools used at estate sales etc.  Even better get them for free.  I inherited my dad’s tools.  Some of his tool are 70 + years old.  My most prized possession of my father’s is his electrician’s folding knife he got in the Navy in 1945 to work on seaplanes during the big one WWII.  Many people disagree with me but one of the reasons why now later in my life I buy the cheapest tool is because I generally only use the tool once.  The other reason is because I’m a cheap old fart!

By the time you have had several classic cars over the years to work on you will have a reasonable core set of tools, such as wrenches, sockets, pliers etc.  Unless you're  independently wealthy budgetary constraints, unfortunately, almost alway limit the size of a personal tool collections. Therefore, it is important to choose wisely when making tool purchases for the workshop.


After 30 plus years of fixing and restoring cars, I have come to depend on certain specific hand tools to help get the job done correctly while practicing my chosen car hobby.  I consider the following specialty hand tools to what the beginner in the hobby needs to start tearing cars apart and hopefully putting things back together.

The first custom tool you must have:  I can not tell you how many time this tool came in handy.  I have at least a different sizes in the corner of my garage.  And, I can truly tell you that I got them all for free. This tool is simply a piece of steel pipe I put on a ratchet or wrench for added torque for those pesky bolts and nuts that want to stay at their place of rest.  I started with a bumper jack post as it fit many of my tools inside its oblong open center.  The last time I used the what I call the wrench extender was when I had to set the crush bearing on the pinion gear of rear differential of my 1957 Chevrolet non Bel Air-150-2-door sedan.  The process requires 90 pounds of torque.  The extender was the only way to get the torque wrench to click the correct twisting force.


Home made pinion yoke holder

My next point.  Necessity is the mother of invention and with tool collecting.  Every shop should have a few homemade tools and other odds and ends.  Such as, pieces of heavy steel of different sizes and shapes.  Be certain to keep these homemade tools in your collection because you never know when you will need them.  You never know when lift a car body of the frame to put a spacer in place or nudge an engine over a fraction of an inch needed to get a bolt hole to line up.  My pipe extender and solid metal pry bars have more than earned their keep by getting the different tough jobs done safely and efficiently.  


My custom wrench and ratchet power extenders and long punches

Torque Wrench:  Torque wrenches are expensive, but worth the cold hard cash.  Many guys think, “Do I really need one?”  Experienced mechanics, in particular, some think they have a good enough feel to judge when a bolt is at just the correct torque setting.  I am sure that there are people out here that can do just that but really how can the hobbiest get that experience? And, really why take a chance?  If you were working on a Model T I would believe you but from 1918 to 1950 engeneering came a long way.  My friends Model T repair book had little or no torque specifications. The manual states that main bolts be handed torqued and  tightened enough more to line up the cotter pin holes. Tolerance were by today's standards so loose back then that it really didn’t matter all that much. Also, In the book it told you to set the ignition points with a well worn dime.   

Image result for Model T repair book

Any car built after 1950 it is absolutely necessary to set some bolts at the correct torque. If not properly torque suspensions, steering, braking and driveline applications will fail during use if incorrectly torqued.

Soft-faced Hammer:  My favorite saying is, “Just get a bigger hammer!”  A hammer is needed in every tool box.  The problem with hammers is that sometimes they can fix something for good.  Yet, there is no dethe importance of hammers while working on old cars.  

Among the different hammers in your toolbox, you should own at least one soft face hammer with a soft face.  It is not recommended to hit hard metal against hard metal.  Instead it is suggested to use a hammer made from brass, plastic, rubber or some other type of soft hammer head.

My soft-faced beater collection

Short Handle, Flexible head, Universal Joints,  Extension Bars, and different sizes of Ratchets:  For engineering reasons unbeknownst to me many classic car nuts and bolts are hard to get to for service  The short handle quick release ratchet gets into those tight spaces. This ratchet wrench is ideal for quickly removing and replacing most threaded fasteners in hard to reach places. Besides the small handled I would suggest collecting as many universal joints, extensions in every size of ratchet drive.  ¼” ⅜” and ½” drives are recommended.  Start with the ⅜” drive as it is the most versatile.  I had a friend who said, “If you are afraid of twisting off a bolt use a ¼” drive and it will never over torque and break a bolt.”

Short Handle, Flexible head, Universal Joints,  Extension Bars, and different sizes of Ratchets


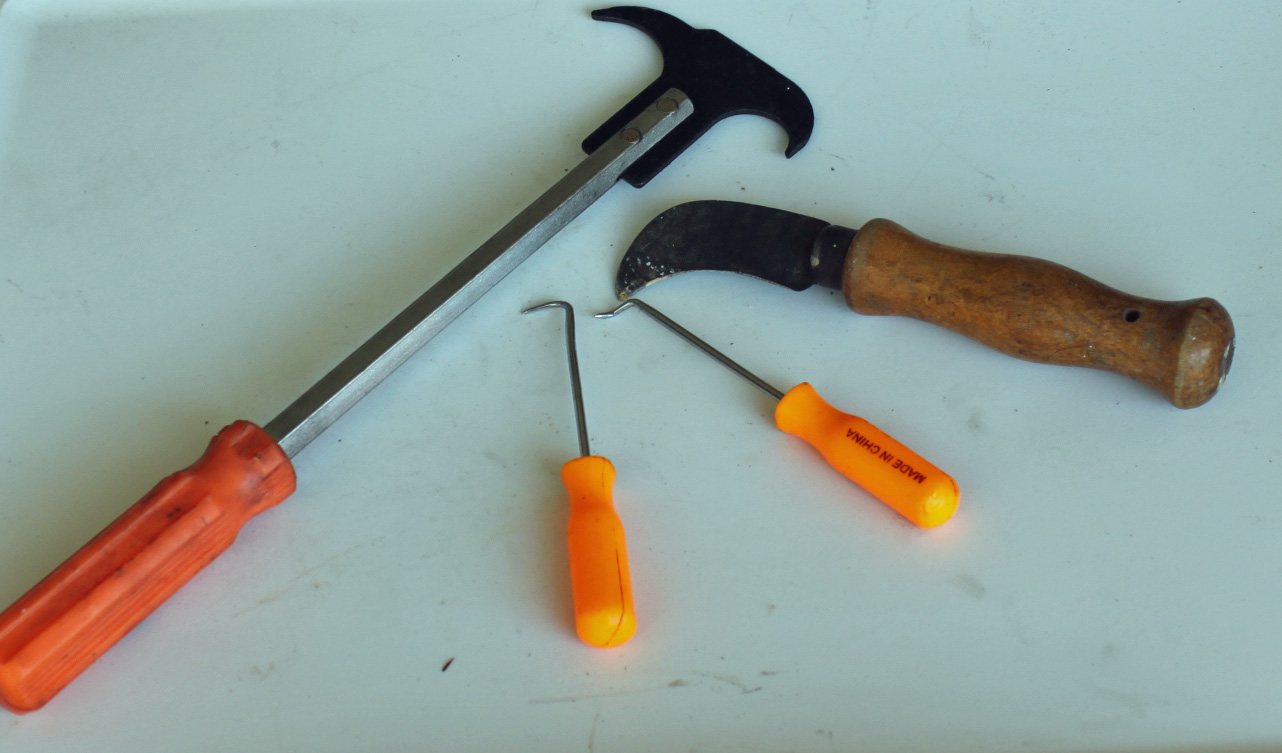
Hook Tools:  A hook handle is really a screwdriver-type handle with some type of bend or hook on its end.  If you have one you will be surprised of it many uses. I always use it for removing all types of stubborn hoses, pulling out cotter pins, prying apart stuck parts, picking out  rust or dirt etc.

Hook tools in my arsenal
Specialty Pliers:  Specialty pliers such as a bent needle nose, lock clip and the most important the spring clamp or snap rings.  Ever try to remove an internal snap ring with an ice pick.  I have, not fun.  I got it out but could not replace the ring without snap ring plyers I had to go out and buy.  

Specialty Pliers


Multi-Bit Screwdrivers:  Fix a variety of projects at work or around the house with 22 of the most common precision screwdriver bits. Each bit is held magnetically in the ratcheting precision handle with easy switch forward and reverse motion. The clear case lid provides easy visibility to all tools inside.  Bare bones bits:  slotted bits, Phillips bits, Pozi bits, hex bits and  star bits.  It is nice to also have a ree turning end cap allows constant finger pressure while turning a comfort grip ratcheting handle.  And, if you are a Tri-Five Chevy guy like me you have to find at most Tri-Five venders a clutch head bit.


Odd-Shaped Wrenches:  If you own a Classic Chevy you know you can not loosen the distributor clamp nut wrench without a vehicle specific wrench.  Another example would be the side post on late model batteries.  As you see these pre shaped designs ar for a specific application but you imagination will find new uses for them.  

Odd-Shaped Wrenches
Precision Measuring tools:  Proper measurements of different classic car procedures is essential for proper assembly.  Mostly used for engine building but can be used in many other areas of repair or restoration as well.  One way to go for a precision measuring would be a micrometer.  Or, in my mind’s eye, a more versatile non engine building precision measuring is the dial caliper or vernier calipers.                                                  

Precision Measuring tools
Modified wrenches and other tools to suit your needs:  I had some friends over to my garage to help me repair a leak in my 1957 Chevy’s A/C unit.  I have have a small drawer in my stand up tool box of broken tools.  As one of my helpers open the drawer he judgmentally asked me why I did not throw away this junk.  I’ll tell you what I told him. “You never know when something weird comes up and you have to make a tool to fix something.”  For and example I had a 1980 Chevy Citation that had a fuel line bolt that was underneath and set back under the car’s body.  If I had a crowfoot wrenches that are specially made  open-end sockets that come in handy when reaching around obstacles I would have had no problem removing the bolt.  However, I did not.  What did I do? I took an old broken wrench and custom bent and welded it so it would get at the stupid bolt.  And, it worked.

Some of my special made tools.  
Ball Joint Separator:  I placed this tool on the list because I have used it for many custom removal operations while wrenching on my cars.  I never had the tool until I had to change out the ball joints on my Chevy.  Now it is my favorite pry bar and demolition separator.  Ball joint separators are designed to be used to help replace worn-out ball joints and to remove CV driveshafts on FWD vehicles. They feature heavy-duty alloy steel construction that's heat-treated for long-lasting use and durability. They have a long, sturdy handle for easy grip and operation.

Ball Joint Separator and pry bars
This is my top ten essential specialty hand tools.  Over time you will have all these tools and more, but this a good beginning and I really had more of my tools to show you, but I can't find them. Where is that body hook and dead blow hammer????????


!!!Support Texas Classic Experience!!!
Did you like the blog?  If you did, the best way to support Texas Classic Experience is to share this post!  Please tell others that you liked this post by sharing it with your car friends by sending them a link to this page.  http://texasclassicchevyexperience.blogspot.com/


Don’t forget to visit and like Texas Classic Experience on FaceBook:  LINK to FaceBook
My winning Peal Out at the 2011 Lone Star Classic Convention in Dallas

Texas Classic Chevy Experience will post blogs about: Hot Rods, Chevy, Chevrolet, Drag Racing, Car Shows, Classic Cars, Custom Cars, Muscle Cars, How to Tech. posts, Dallas Area Classic Chevy Club, Texas Muscle Car Challenge, Tri-Five Nationals, Lone Star Chevy Convention, Classic Car lists, Classic car links, Spotters guides, Car Shows, Swap meets, Book reviews and More.

*********************

Sunday, June 5, 2016

Classic Car Updates Modifications That will Give you A Safer and More Enjoyable Ride Out Of Your Classic Car

Classic Car Updates
Modifications That will Give you A Safer and
More Enjoyable Ride Out Of Your Classic Car


-Alan Arnell


In years past many people wanted their classic car to be totally stock.  Some classic car guys still want that, however today’s car hobbyist is not so true blue.  The trend today is to modify your car with modern parts.  I believe this trend is taking hold because of the increased traffic and higher highway speeds.  From personal experience, I can tell you that it takes some getting use to drum brakes and a single bore master cylinder.  Many time when I first got my 1957 Chevy 150 non Bel Air 2-door sedan and I hit the brakes on a hard stop for a moment I thought I had no brakes.  Today, car brakes even in low end models are a world beyond in braking performance.  I have to admit it, that I for one am spoiled with today’s late model cars.  
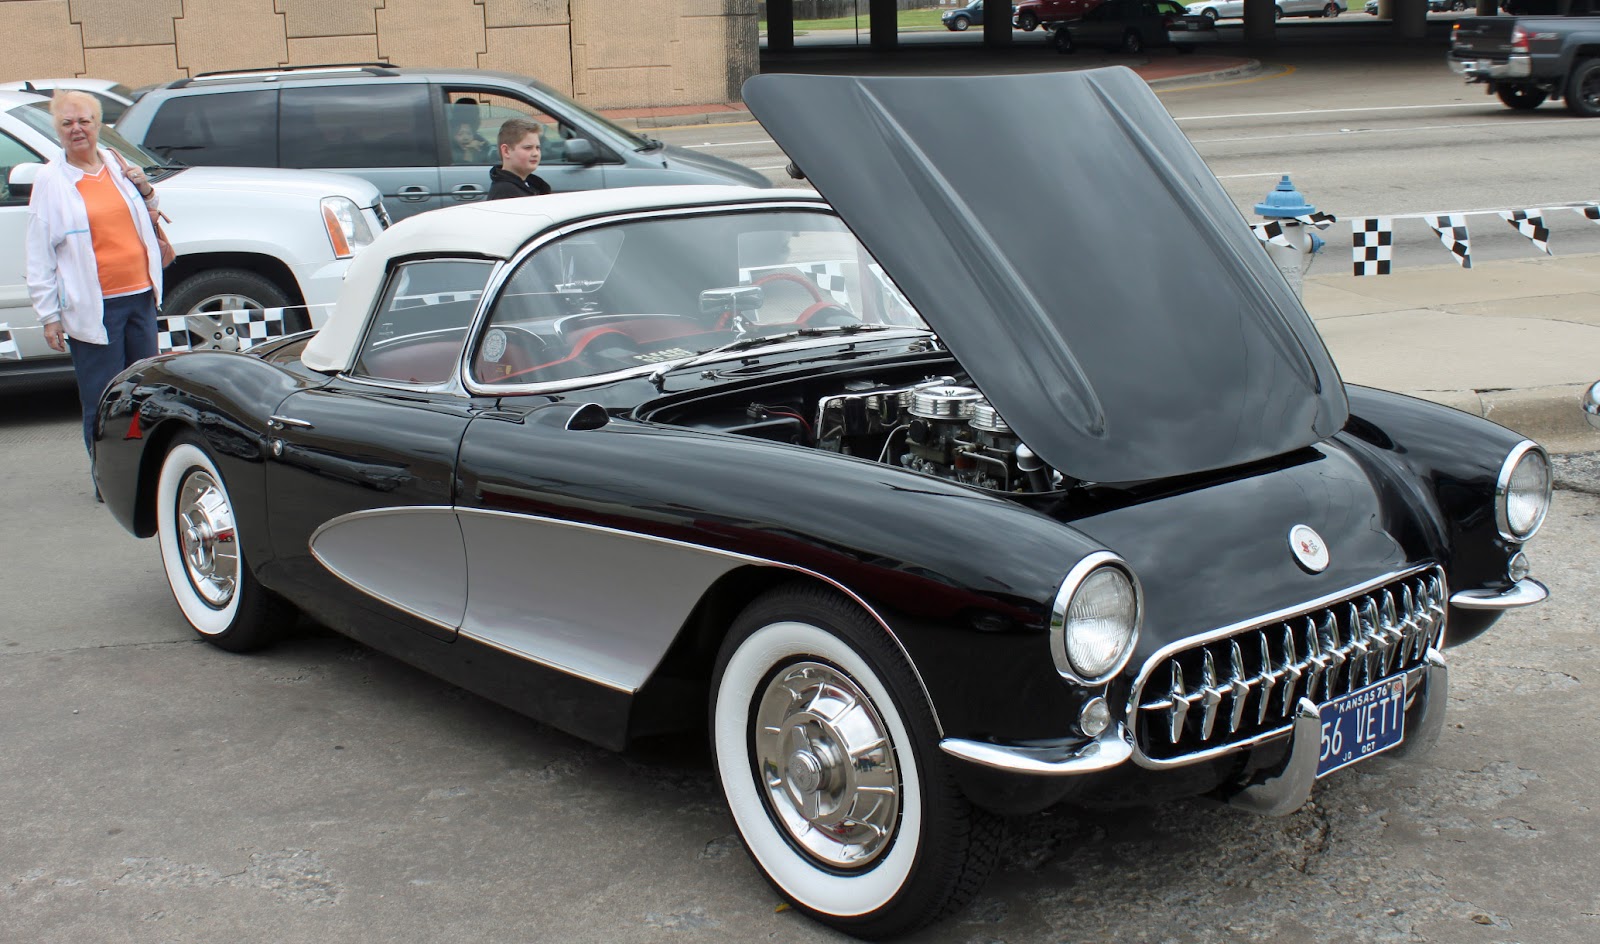

IMG_8578.jpg
Pure stock 1956 Chevy Corvette


If you want to drive your classic car I believe you will eventually will want the comforts of a late model car.  AM radio, no air conditioning and sealed beamed headlights to name just a few items will need to be upgraded for a pleasant drive in today urban environment.  Let’s face it, it is more fun to drive your classic rather than let it set in you garage, because it is so unwielding and a pain to drive.  That’s my guiding motto anyway.  


For other like minded classic car owners who are not overly concerned with maintaining strict adherence to factory originality, there are a variety of thing that can be done to make your classic a safer and more enjoyable car to drive.  


With all I have written about in mind, here are some suggestions for making a  60 year old car more user friendly for cruising around to car shows and other classic car events.
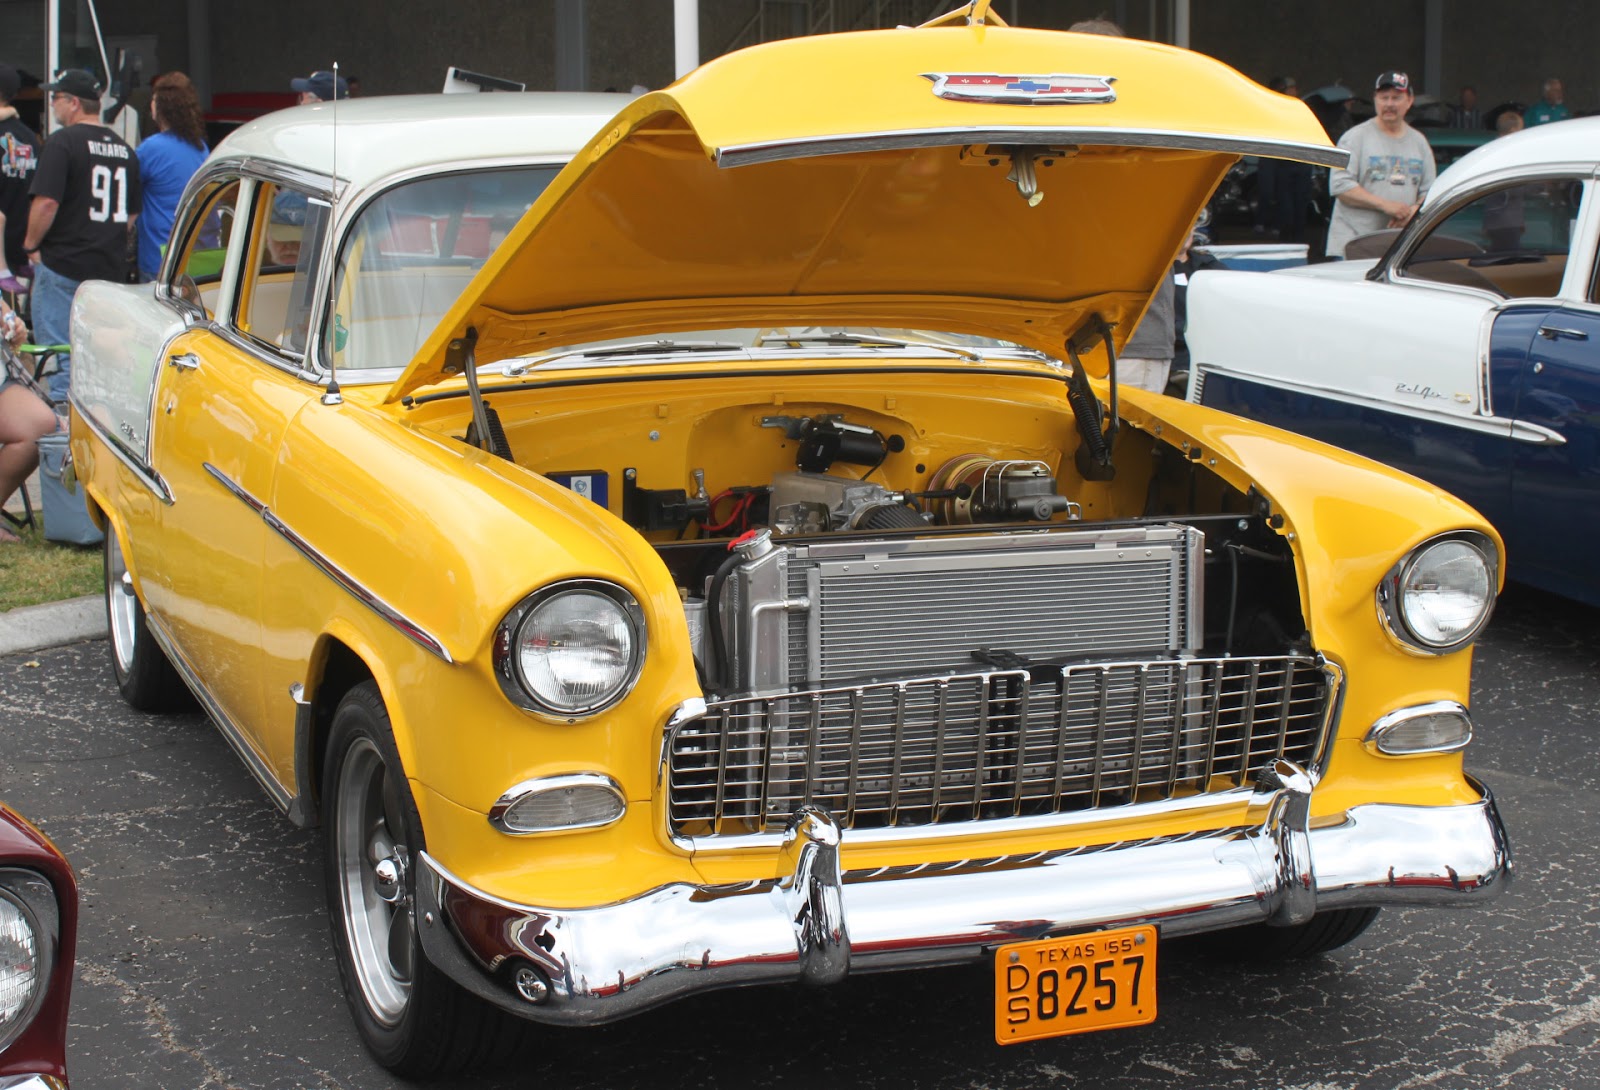

IMG_8553.jpg
This Car Is Stock Looking On the Outside but Sports All Modern Components Underneath the Sheetmetal


Killer Tunes:  My parents were a part of the “Greatest Generation” and never bought a car with a radio until new cars would not come without them.  Ann and Arnold  just had no interest in listening to music while driving.  They bought a RV to tour the country late in their lives.  For their extended trip to explore the USA, I bought them a dozen age appropriate cassette tapes.   Years later, after they had passed away and I was cleaning out their home, I found all 12 of the tapes still unopened..  


Classic cars in the 70’s, not alone the 50’s, came equipped with terrible radios compared to anything we listen to in traffic today.  In ‘57 the radio was equipped with tubes and generally have long since died, unless extensive restoration had been made to them.  Even restored, listening to a vintage radio can be a beat down.  Listen to an AM radio station through a small single speaker in the dashboard is not what we are use to today.  Now we don’t use tapes or CD’s for our tunes. Most of us have their favorite tunes on an iPhone.  
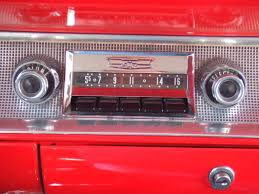

A Modern Radio and Bluetooth Unite Constructed to look Like a 1957 Stock Radio.  


Regardless of what kind of car you have, you will definitely find and enjoy a modern stereo that fits in your stock dash opening.  There are even companies that make a modern units that fits and looks like a stock unit.


Gas Shocks and Sway Bar:  Adding modern, high quality gas shock absorbers will really help to improve your classic car’s ride quality and handling characteristics.  To stop body roll a sway bar or bars may be the best handling add on you can do for your car.  


To learn about and read about my sway bars installation on my ‘57 Chevy go to LINK


Halogen Headlamps:  Putting halogen headlamps on your classic is a very simple operation.  Once the new lamps are in place you will be amazed at the improved results.  


Many classic cars have very yellow looking lights that do not do a good job of lighting up that dark road.  Halogens produce a whiter light that goes farther up the road that may give that much need reaction time.  
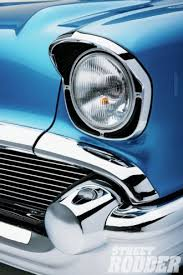

A Tricked Out 1957 Chevy Sporting Very Bright Halogen Head Lamps 


Finding halogens for your classic car is easy.  Headlamps size have been standardized from the time they switched to electric.  


Electronic Ignition:  Cars have used an electrical distributor for maybe a hundred years. However, classic were produced with a points and condenser to meter the spark to the combustion chambers.  The old points and condenser system is very much inferior to an electronic system.  The old style is not as precise and requires regular maintenance, Furthermore, their performance will get worse over time.  When I had my 1969 Chevelle, I had to change the points every six thousand miles or the car would hardly run.  


By converting your distributor to an electronic system you can improve an engine’s cold start performance, increase power output, decrease fuel consumption and reduce tailpipe emissions.  The upgrade will eliminate the need to regularly adjust dwell, timing, the points and condenser.
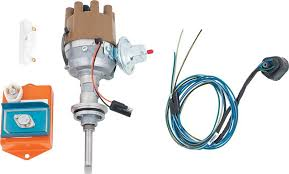

Electronic Ignition Distributor Kit For a 1955 Chevy


You may go two ways to upgrade to an electronic ignition.  The original distributor may be used and retrofitted with a simple kit.  I change over my boat and all I had to do was replace the points with the new unit and run a power wire.  Doing the retro was easy and fast. Another way to go would buy a complete distributor with an electric ignition system.   
:
Disk Brakes:  Back in the day, except for some sports cars like the Corvette, cars were equipped with four-wheel drum brakes.


The drum brake system has been around since the earliest days of car manufacturing.  The system was a tried and true inexpensive system.  Alway trying to improve, later cars automakers first introduced a front disk and rear drum brake system in the ‘70s.  Today cars generally come with four-wheel discs.  
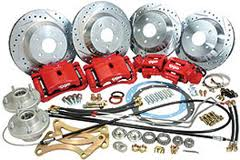

Stop on a Dime Disc Brake Conversion Kit for a 1956 Chevy


Discs brakes will give any car better stopping power.  This improved stopping power adds to the margin of safety making a safer car.  Many manufacturers produce aftermarket disc brakes that are a direct fit for you classic.  


This upgrade is more labor intensive, more costly and has a higher level of difficulty than the previous upgrades.  But, if you study, buy matching-quality parts, take your time and are not afraid to try or ask questions you should be able to complete the upgrade.


For more information about disc brake conversion on a ‘57 chevy see LINK


Air Conditioning:  If you lived in Texas you would know how hot and unpleasant the inside of a classic car can be in August.  My ‘57 has wing vent windows that will blow air on you that will make my classic at least barrable on the road.  However, the wind beating on you over a long trip can be noisy and tiring.  But then, when I stopped at a stop light I thought I would melt into butter and ooze down to the floor boards without my A/C system.  It was no fun showing up to a summer car show feeling and looking like a soggy noodle.  No deodorant will win over 120 degree heat. Who wants to stink!
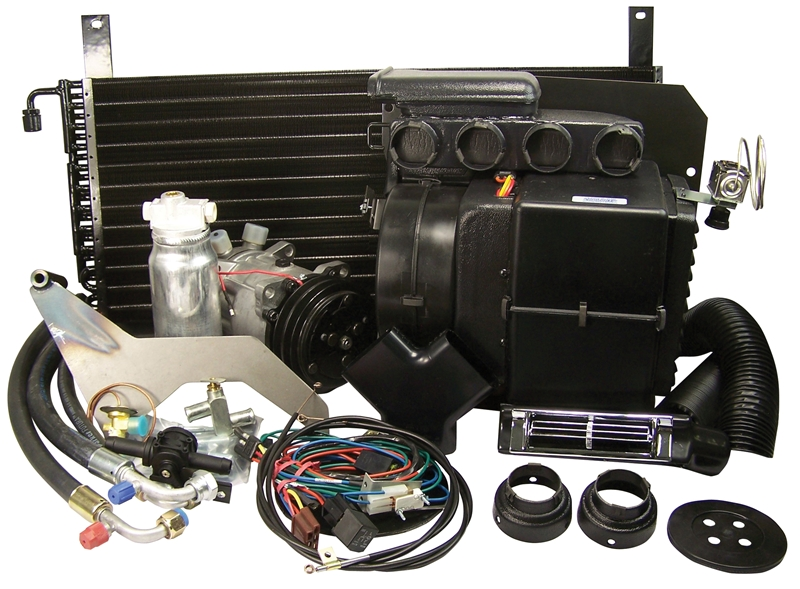

A Sure Fit A/C Kit for a Classic Chevy


For my Tri-Five, I bought a Classic Air kit.  The install is time consuming, yet besides the changing of the system not a difficult process.  The system I have is a conventional system with a compressor that is run off a pulley system.  My Perfect Fit Classic Air unit also comes with not only air conditioning,  but also has heat on the floor, and dehumidified defroster


To find out about my A/C retrofit on my ‘57 go to  LINK


Modern Engine and Transmission:  Lets face facts, the classic engine compared to a modern engine fails in comparison.  Older engines run dirtier, often smell bad, give relatively poor fuel economy, require regular maintenance such a point and plugs, are much heavier relative to their power output and require more frequent overhauls.  In the ‘50 having to do a valve job every fifty thousand miles was the norm.  I can remember watching my dad do a valve job on his 1954 Dodge under the cottonwood tree in our back yard.


While some car folks consider all of the above to be apart of the charm of a classic car, others choose to get more pleasure out of their classic car if not more power from a modern engine and transmission.  My ‘57 Chevy has a 4-speed Borg Warner and a 3.42 rear gear. When my 2009 Chevy Truck traveled at 70 MPH the engine registered 1800 RPMs. My ‘57 Chevy on the other hand turns 3200 RPM’s at the same speed.  That discrepancy in RPMs is disconcerting to say the most to say the least.  
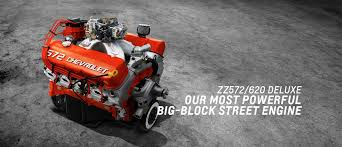
For The Lucky Few That Want Horsepower Out the Ying Yang


An engine upgrade is by far the most ambitious and costly project listed in this blog post.  


The possibilities when considering an engine and transmission update are limited only by your imagination, ability and bank account.  You could go to the extreme with a 572 CI big block or a more sedate swap.  


Regardless of how complicated or simple you choose to go, the successful completion of the installation of a modern engine and transmission will make your classic car more reliable, environmental friendly and enjoyable to drive.


Never stop driving and never stop thinking about your old classic.  I know I never will with mine.  

sdfghjkl;.JPG
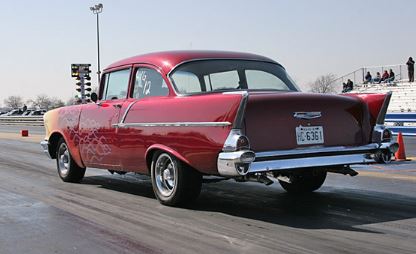
Me Drag Racing at Lone Star Dragway in Denton, Texas in my 1957 Chevy 150


!!!Support Texas Classic Experience!!!
Did you like the blog?  If you did, the best way to support Texas Classic Experience is to share this post!  Please tell others that you liked this post by sharing it with your car friends by sending them a link to this page.  http://texasclassicchevyexperience.blogspot.com/


Don’t forget to visit and like Texas Classic Experience on FaceBook:  LINK to FaceBook
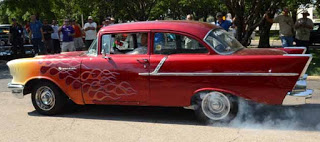
My winning Peal Out at the 2011 Lone Star Classic Convention in Dallas


Texas Classic Chevy Experience will post blogs about: Hot Rods, Chevy, Chevrolet, Drag Racing, Car Shows, Classic Cars, Custom Cars, Muscle Cars, How to Tech. posts, Dallas Area Classic Chevy Club, Texas Muscle Car Challenge, Tri-Five Nationals, Lone Star Chevy Convention, Classic Car lists, Classic car links, Spotters guides, Car Shows, Swap meets, Book reviews and More.

*********************
A Great Tri5 Chat Board