The Photo Basics The Hows and Whys ofTaking Photographs ofYour Tri-Five Classic Chevy
-Alan Arnell
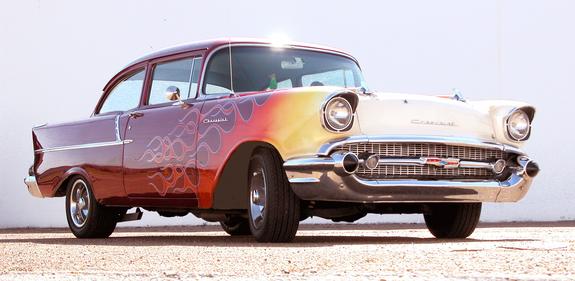
If you have a Classic Car you taken photos of your pride and joy. Unfortunately, many of us have been disappointed with the results. In this blog the reader will be presented with methods that may help you improve your car photography for your personal amusement and better to be submitted to a magazine or publications. Really, who would not like to have your car on the cover of the a Magazine. Not, all publications have a professional go out to take picture of your car. Many media outlets, take submissions of photos and written articles. I myself have had my car in a magazine. My car was in the September 2007 Chevy Classics magazine.
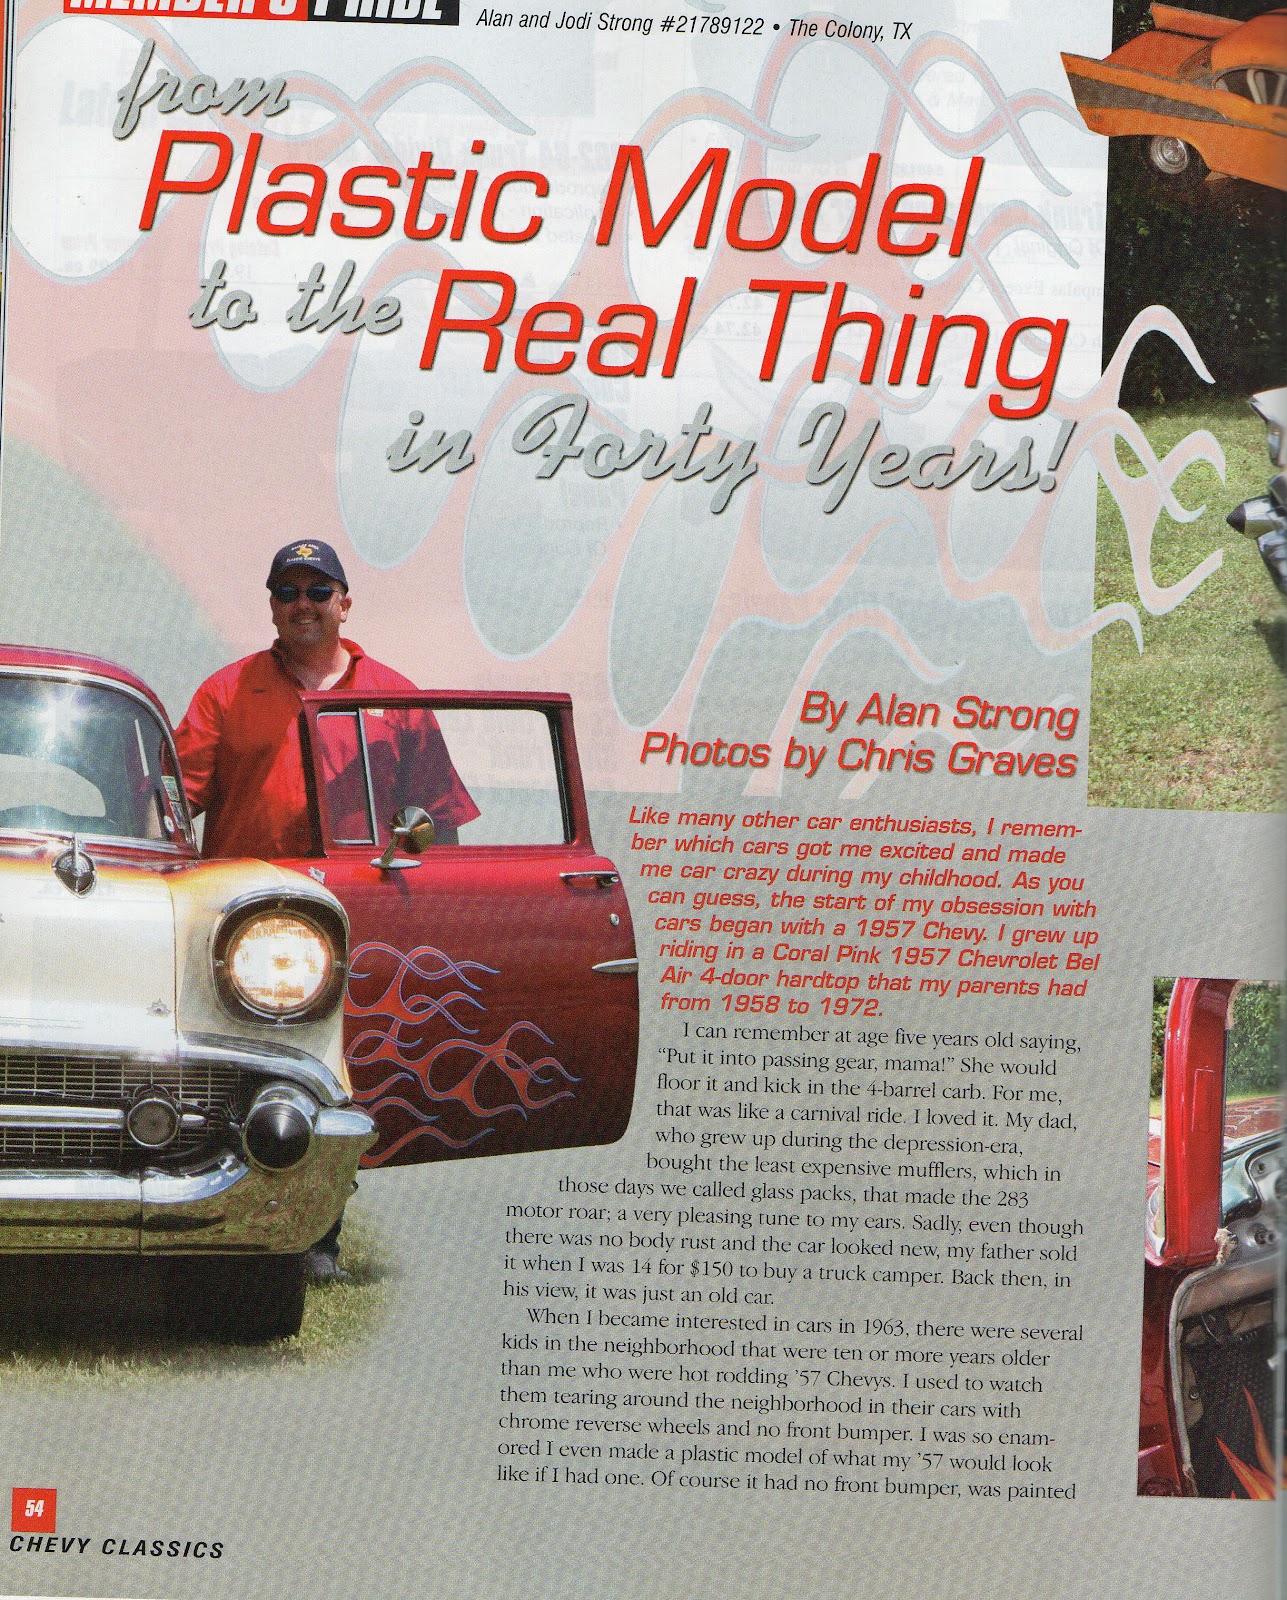

My '57 Chevy in Chevy Classic Magazine
Photo's by David Graves
There are several things to consider when preparing to photograph you car. Some of these considerations may seem elementary and may not apply to you, but you would be surprised at some to the small things that make a car photo more pleasing to the eye.
Start with ensuring that you car is clean, including tires and wheels. Keep some Armor All on hand to do any last minute cleanup.
Your choice of surroundings of your car may make or break you photo. As an example, if your car is a light color, ensure to place the car with a darker background with no clutter. If the car is dark choose a spot with light areas. Also make sure not to include other cars or distracting objects in the photo.

Planning your location is important. If you can choose where to take the pictures, plan ahead and take your time to get the best place (preferably not your local parking lot) during the most ideal light conditions. It well worth the effort.
On one of the vintage car forums I belong to the winner had a green car under a tree that had shed many of its yellow leaves on the ground below. The color combination won the photo contest.
After finding the perfect location, check out the way the sun is positioned in relationship to where where the car is located. The car should be facing the sun or the sun should be at the back of the photographer’s back.
Shoot from above. Look for a nearby ledge or bridge, or take a step ladder so you can get up above your car. This provides an unusual view and shows off the car's sleek lines, making for a more dynamic photo.

Get low to the ground. This gives your car a powerful look, perfect when photographing muscle cars and trucks.
Shoot front, side and rear views. All three provide a very different view of your car, showing off different features. Also use a combination of views to show more than one side at a time, such as with the ever-popular "three-quarter" view which shows the front and side of the car.
Show all four wheels. When shooting low to the ground and from a three-quarter view, be careful not to cover the far back wheel with the near front one. Doing so can make your car feel unbalanced, like it's missing a leg.
The best would be get the opportunity to shoot during the golden hours, i.e., couple of hours after sunrise and couple of hours before sunset. Available light is almost always better than a built in flash, but if you spend more and learn how to use it, artificial lighting like strobes can do miracles, revealing details and shapes like you've never seen before.
Grass does not retain as much heat, therefore your shots will be clearer if you shoot over foliage instead of black asphalt.

Although any digital camera will suffice, for best results take your DSLR camera. The selection of lens depends on various factors like location, lighting, etc.
Forget your iPhone. Yes, the latest ones are remarkably capable, but they are phones nevertheless. What you want is a camera. A DSLR, or a mirrorless, or a very good compact, something that was designed to do one thing: shoot under the widest possible range of conditions.
5 beginner DSLR cameras that will help you take your photography hobby to the next level:
Canon EOS 1200D ($399) ...
Nikon D3200 ($450) ...
Pentax K-50 ($450) ...
Canon EOS 100D/Canon EOS Rebel SL1. ...
Nikon D3300
Megapixels have become the ultimate measure of a camera. If your cousin has a camera with more megapixels than your year-old camera, clearly he must have the better, higher-quality device. Right? Wrong.
Megapixels vs. pixel size
Like calories, megapixels are a measure of quantity, not quality. You need a certain number of megapixels depending on the way to want to share a photo. But just as the number of calories in a meal doesn't say much about how nutritious it is, the number of pixels in a camera doesn't say much about the quality of the image they can capture.

Quality is a complex issue based upon a camera’s optics, image sensor design, firmware, engineering, and yes, its pixels — but not its megapixel count. At the heart of your camera is the image sensor, which contains the array of pixels. These pixels are like buckets that collect photons (i.e., light).
Learn to use a photo editing program such as Adobe Photoshop. Digital Photo editing is popular these days for it helps designers and editors in their works. It turns mere pictures into masterpieces. Its versatility made it in demand in the creative world for it is the best photo editing software program that gives you great features for a totally terrific design. Other than that, Adobe Photoshop is user friendly and it provides tools that will aid you in the editing and enhancing of photos. You can also do some lay-outing and designing from a blank document, whatever size you may want.
Use the RAW format when taking photos. JPEG – JPEG files are processed right within the camera. How exactly they are processed varies from model to model. While color temperature and exposure are set based on your camera settings when the image is shot, the camera will also process the image to add blacks, contrast, brightness, noise reduction, sharpening and then render the file to a compressed JPEG. These files are finished and can be viewed and pri.

Use a tripod/monopods. They are super cheap, and they're a must under low light conditions, in case you want to use the self timer, during long shoots or when you want to be as accurate angle-wise as possible.
You must be very careful of what reflects in the car. Have a look around you and look closely at the car and see what reflects on its surface. A car (especially a new shiny one) is like a mirror. Try and have an open space behind you like a field. Try and avoid shooting with buildings or trees behind you. One of the most important things you want to show in your car pictures are the design lines of the car, or as I like to call it, ‘her curves’. Reflections can spoil these curves. Wear black clothing so that your reflection is reduced when you’re photographing the car from close up.
Also be very careful not to have your own reflection in the photo. If you can’t avoid your own reflection it’s best to put the camera on a tripod, set the timer and move out of the shot.
Shooting at eye level is the most obvious way to photograph a car. Although it works fine if you're advertising your car for sale in the local paper, it doesn't produce a particularly engaging photo. Use your imagination and try to find an angle that really shows off your car.

When taking photo’s of your car position yourself at an angle that lets you capture the entire length of the car. Next, shift your position so that the car is facing diagonally and then take a couple of photographs. There are two main angles from which the car can be photographed. First, the classic standing position and, second, from the height of the bonnet, which in most of the situations will be about your waist height. A DSLR camera with tilting LCD will be an advantage.
Feel free to explore other angles like low angle and maybe a higher vantage point, if you get such an opportunity.
While taking longer range photos use the rule of thumb guideline. The rule of thirds is applied by aligning a subject with the guidelines and their intersection points, placing the horizon on the top or bottom line, or allowing linear features in the image to flow from section to section.
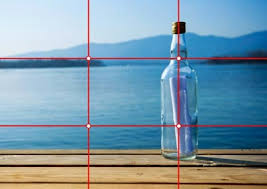
The rule of thirds is a "rule of thumb" or guideline which applies to the process of composing visual images. The guideline proposes that an image should be imagined as divided into nine equal parts by two equally spaced horizontal lines and two equally spaced vertical lines, and that important compositional elements should be placed along these lines or their intersections. Proponents of the technique claim that aligning a subject with these points creates more tension, energy and interest in the composition than simply centering the subject.

The photograph to the right demonstrates the application of the rule of thirds. The horizon sits at the horizontal line dividing the lower third of the photo from the upper two-thirds. The tree sits at the intersection of two lines, sometimes called a power point or a crash point[citation needed]. Points of interest in the photo do not have to actually touch one of these lines to take advantage of the rule of thirds. For example, the brightest part of the sky near the horizon where the sun recently set does not fall directly on one of the lines, but does fall near the intersection of two of the lines, close enough to take advantage of the rule.
When shooting black interiors it is very easy to overexpose the shots because your camera thinks that you are shooting something that is very dark. Underexpose a bit and you will get great detail and accurate blacks.
Now let’s get out there and make some quality if not quantity photos of you classic car. I am certain that using the above hints you will be very pleased with the results. Good luck and thank you for reading my blog. Please check back for new posts or explore older Texas Classic Chevy blog posts.
!!!Support Texas Classic Experience!!!
Did you like the blog? If you did, the best way to support Texas Classic Experience is to share this post! Please tell others that you liked this post by sharing it with your car friends by sending them a link to this page. http://texasclassicchevyexperience.blogspot.com/
Please use the add link to purchase auto part, books, etc
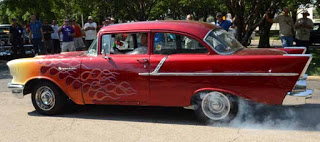
My winning Peel Out at the 2011 Lone Star Classic Convention in Dallas

No comments:
Post a Comment
Note: Only a member of this blog may post a comment.